Looking for an adorable crochet project that combines cute animals with fruity designs? This easy crochet strawberry duck amigurumi pattern is a delightful project for anyone who loves making handmade plush toys.
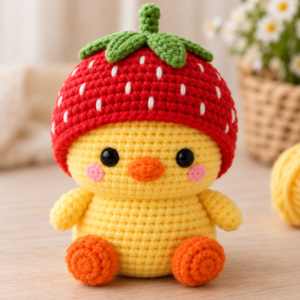
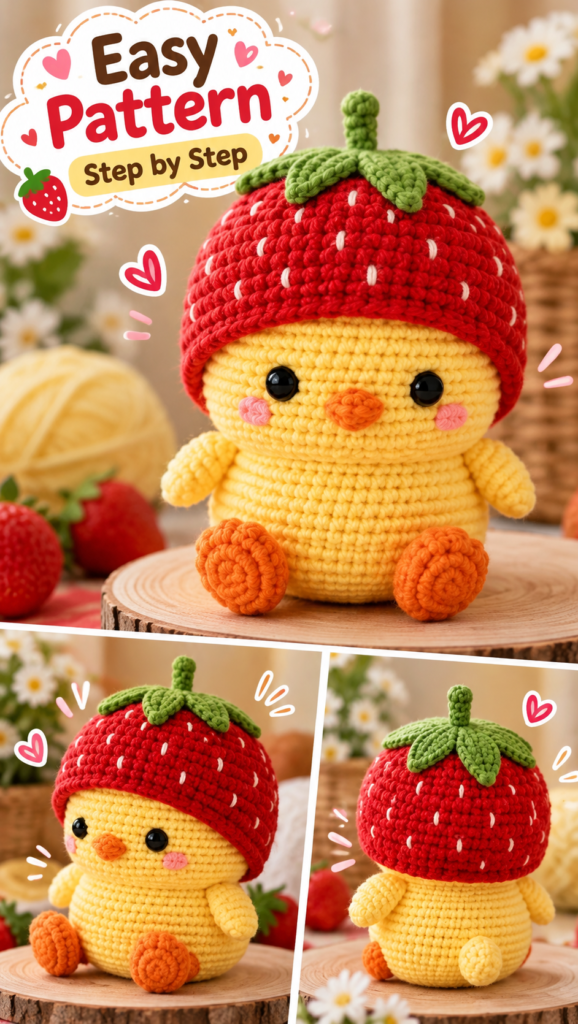
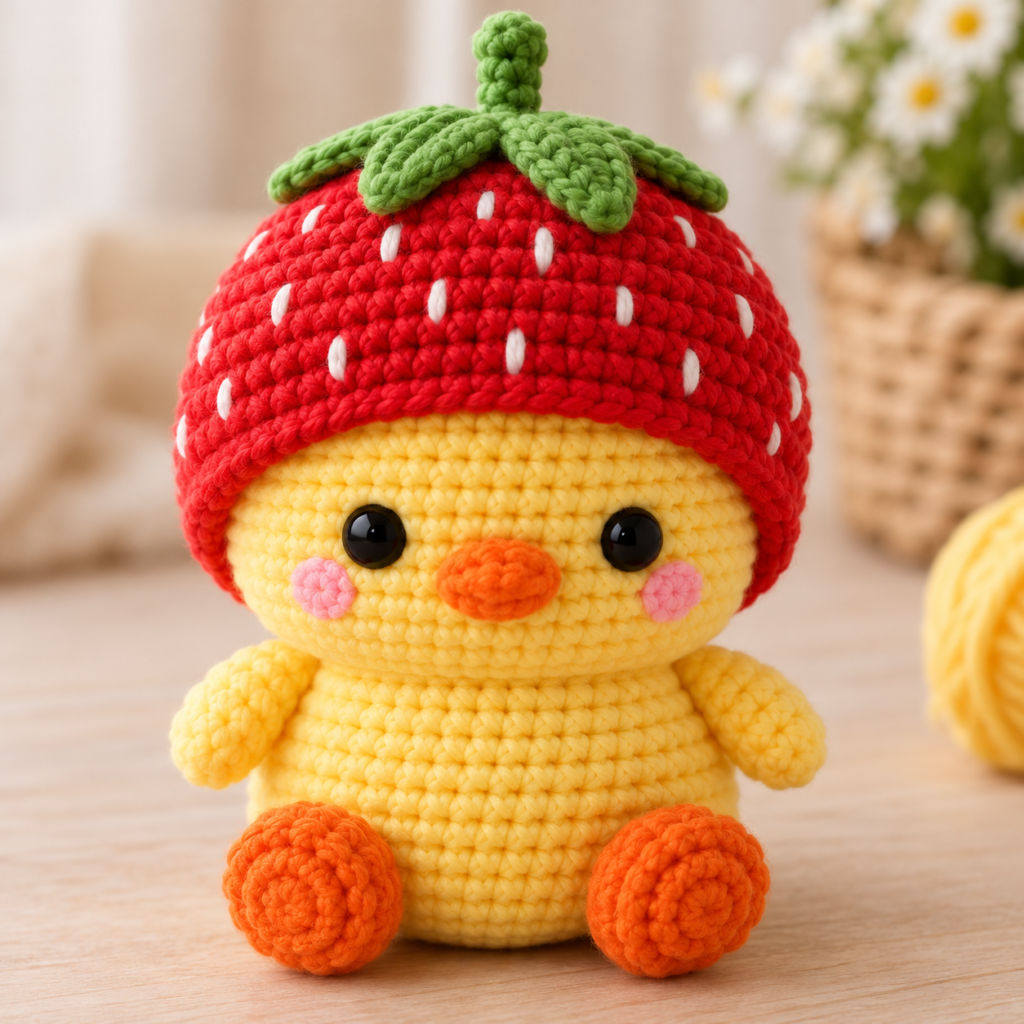
This charming little duck features a soft yellow body, tiny orange feet, a sweet orange beak, rosy pink cheeks, and a bright red strawberry hat decorated with tiny white seeds and green leaves.
Its rounded body, small wings, and oversized strawberry hat create an irresistibly cute appearance.
Whether you’re making a handmade gift, adding a new character to your amigurumi collection, or simply enjoying a relaxing crochet project, this strawberry duck is sure to bring a smile.
In this step-by-step tutorial, you’ll learn how to crochet the duck’s body, wings, feet, beak, strawberry hat, green leaves, and facial details before assembling everything into one adorable creation.
Why You’ll Love This Crochet Strawberry Duck Pattern
There are so many reasons to try this cute amigurumi project!
- Adorable design: A tiny yellow duck wearing a strawberry-inspired crochet hat.
- Beginner-friendly: Uses basic crochet stitches, increases, and decreases.
- Fun fruity theme: Combines a cute animal with a colorful strawberry design.
- Perfect handmade gift: Great for birthdays, special occasions, and crochet lovers.
- Customizable: Try different fruit hats, colors, and accessories.
- Great for leftover yarn: Small amigurumi projects are perfect for using yarn scraps.
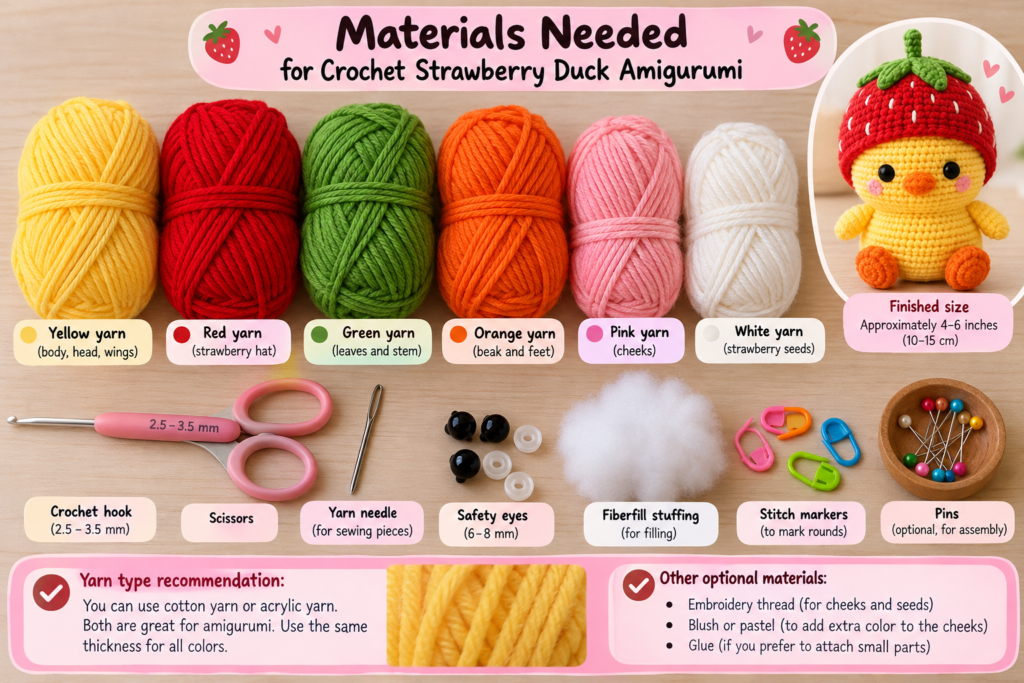
Materials You’ll Need
Before starting your crochet strawberry duck, gather the following supplies.
Yarn Colors
- Soft yellow yarn for the duck’s body and wings
- Bright red yarn for the strawberry hat
- Green yarn for the strawberry leaves and stem
- Orange yarn for the beak and feet
- Pink yarn for the cheeks
- White or cream yarn for the strawberry seeds
Crochet Supplies
- 2.5–3.5 mm crochet hook
- 6–8 mm black safety eyes
- Polyester fiberfill stuffing
- Yarn needle
- Stitch markers
- Scissors
- Optional: Embroidery thread for facial details
Skill Level: Confident Beginner
Estimated Time: 3–5 hours
Finished Size: Approximately 4–6 inches tall, depending on yarn weight, hook size, and tension.
Crochet Abbreviations (US Terms)
Before beginning, familiarize yourself with these common crochet abbreviations.
- MR: Magic Ring
- CH: Chain
- SC: Single Crochet
- HDC: Half Double Crochet
- DC: Double Crochet
- SL ST: Slip Stitch
- INC: Increase (2 SC in one stitch)
- DEC: Invisible Decrease
- FO: Fasten Off
- ST: Stitch
- BLO: Back Loop Only
All instructions use US crochet terminology.
Unless otherwise stated, work in continuous rounds using a stitch marker to mark the beginning of each round.
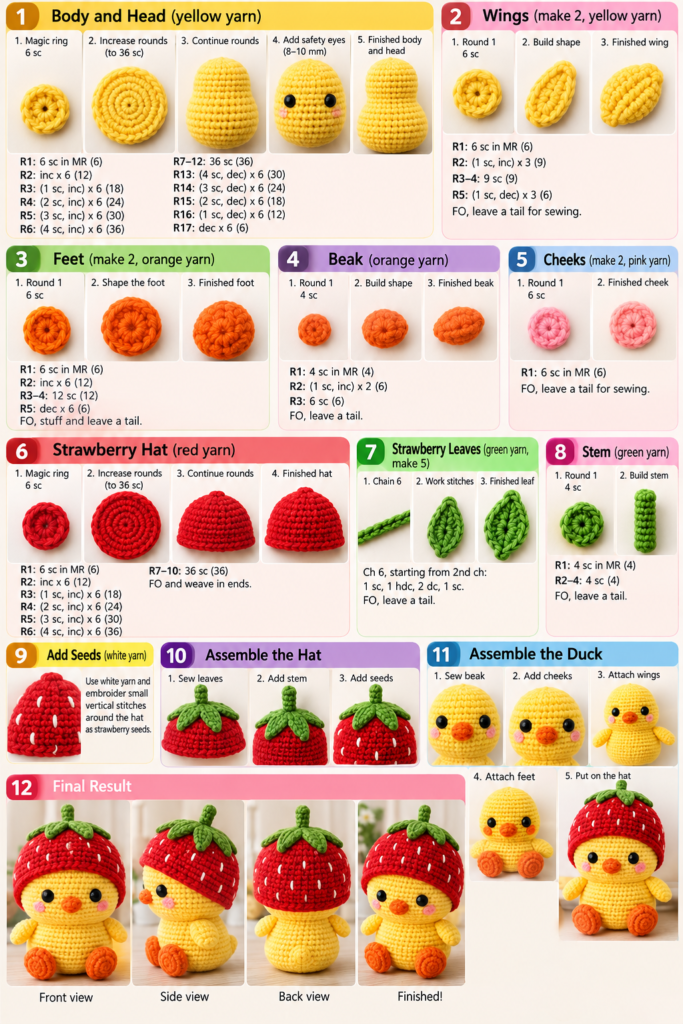
Step 1: Crochet the Duck’s Body and Head
The strawberry duck has a cute, rounded body with a slightly narrower head.
We’ll create the body and head as one continuous piece.
Body and Head Pattern
Using yellow yarn:
- Round 1: 6 SC in MR. (6)
- Round 2: INC around. (12)
- Round 3: (1 SC, INC) × 6. (18)
- Round 4: (2 SC, INC) × 6. (24)
- Round 5: (3 SC, INC) × 6. (30)
- Round 6: (4 SC, INC) × 6. (36)
- Rounds 7–12: SC around. (36)
- Round 13: (4 SC, DEC) × 6. (30)
- Round 14: (3 SC, DEC) × 6. (24)
- Round 15: (2 SC, DEC) × 6. (18)
- Round 16: (1 SC, DEC) × 6. (12)
- Round 17: DEC around. (6)
Add the Eyes
Before closing the body, position the safety eyes between Rounds 9 and 10, approximately 7–8 stitches apart.
Make sure the eyes are evenly spaced and centered on the front.
Secure them firmly.
Stuff the Body
Fill the duck with polyester fiberfill.
Keep the stuffing evenly distributed to maintain its rounded shape.
Close the remaining opening using a yarn needle.
Tip: If the duck is intended for a young child, embroider the eyes instead of using plastic safety eyes.
Step 2: Crochet the Duck’s Wings (Make 2)
The duck has two tiny yellow wings positioned on either side of its body.
Using yellow yarn:
- Round 1: 6 SC in MR. (6)
- Round 2: (1 SC, INC) × 3. (9)
- Rounds 3–4: SC around. (9)
- Round 5: (1 SC, DEC) × 3. (6)
Fasten off, leaving a long tail for sewing.
Flatten each wing gently without stuffing.
Repeat to make the second wing.
Attach the Wings
Position the wings on either side of the duck’s body.
Angle them slightly outward to create a playful appearance.
Sew each wing securely into place.
Step 3: Crochet the Duck’s Orange Feet (Make 2)
The tiny orange feet are one of the cutest features of this strawberry duck.
Using orange yarn:
- Round 1: 6 SC in MR. (6)
- Round 2: INC around. (12)
- Rounds 3–4: SC around. (12)
- Round 5: DEC around. (6)
Lightly stuff each foot.
Fasten off, leaving a long tail for sewing.
Repeat to make the second foot.
Attach the Feet
Position the feet at the lower front of the body.
Leave a small gap between them.
Sew them securely in place.
The feet should point slightly forward so the duck appears to be sitting.
Step 4: Crochet the Duck’s Orange Beak
The duck’s tiny orange beak gives it a sweet, friendly expression.
Using orange yarn:
- Round 1: 4 SC in MR. (4)
- Round 2: (1 SC, INC) × 2. (6)
- Round 3: SC around. (6)
Fasten off, leaving a long tail for sewing.
Flatten the beak slightly.
Position it between the eyes, just below their center.
Sew the beak securely to the face.
Step 5: Crochet the Strawberry Hat
The bright red strawberry hat is the main feature of this adorable crochet duck.
We’ll create a rounded, slightly oversized hat that fits comfortably over the duck’s head.
Strawberry Hat Pattern
Using red yarn:
- Round 1: 6 SC in MR. (6)
- Round 2: INC around. (12)
- Round 3: (1 SC, INC) × 6. (18)
- Round 4: (2 SC, INC) × 6. (24)
- Round 5: (3 SC, INC) × 6. (30)
- Round 6: (4 SC, INC) × 6. (36)
- Rounds 7–10: SC around. (36)
SL ST to close.
Fasten off and weave in the ends.
Shape the Hat
Gently stretch the hat into a rounded strawberry shape.
The hat should cover the upper part of the duck’s head without hiding the eyes.
If necessary, add another round of SC to make the hat slightly longer.
Tip: Try the hat on the duck before fastening off to check the fit.
Step 6: Crochet the Green Strawberry Leaves
The green leaves give the strawberry hat its recognizable fruity appearance.
We’ll create five small leaves and attach them around the top.
Strawberry Leaf Pattern
Using green yarn:
- CH 6.
- Starting in the second chain from the hook, work 1 SC.
- Work 1 HDC into the next chain.
- Work 1 DC into each of the next 2 chains.
- Work 1 SC into the final chain.
Fasten off, leaving a long tail for sewing.
Repeat to create five green leaves.
Attach the Leaves
Arrange the leaves around the top center of the red hat.
Position them so they point outward in different directions.
Sew each leaf securely into place.
Step 7: Crochet the Strawberry Stem
The small green stem adds the perfect finishing touch to the strawberry hat.
Using green yarn:
- Round 1: 4 SC in MR. (4)
- Rounds 2–4: SC around. (4)
Fasten off, leaving a long tail for sewing.
Attach the stem to the top center of the hat, between the green leaves.
Your strawberry hat is beginning to look adorable!
Step 8: Add the Strawberry Seeds
The tiny white seeds make the red hat look like a real strawberry.
Using white or cream yarn:
Thread a yarn needle with a short piece of yarn.
Create small vertical stitches across the red hat.
Space the stitches evenly, leaving a little room between each seed.
Continue until the hat has approximately 12–18 tiny white seeds.
For a natural strawberry appearance, stagger the seeds rather than placing them in perfectly straight rows.
Secure the yarn ends inside the hat.
Step 9: Add the Duck’s Pink Cheeks
The duck’s rosy cheeks create an adorable, friendly expression.
You can embroider the cheeks or crochet two small pink circles.
Easy Crochet Cheeks
Using pink yarn:
- Round 1: 6 SC in MR. (6)
SL ST to close.
Fasten off, leaving a tail for sewing.
Make two small circles.
Position them just below the eyes, on either side of the beak.
Sew them securely in place.
For a softer appearance, embroider small pink blush marks instead.
Step 10: Assemble Your Crochet Strawberry Duck
Now that all the pieces are complete, it’s time to bring your adorable strawberry duck to life!
1. Position the Strawberry Hat
Place the red strawberry hat on top of the duck’s head.
Make sure it sits comfortably above the eyes.
2. Attach the Wings
Sew the yellow wings to either side of the body.
Angle them slightly outward.
3. Attach the Feet
Position the orange feet at the lower front of the body.
Make sure they are evenly spaced.
4. Attach the Beak
Sew the orange beak between the eyes.
5. Add the Cheeks
Attach the pink cheeks just below the eyes.
6. Finish the Hat
Check that the green leaves, stem, and white seeds are securely attached.
7. Final Adjustments
Gently shape the body, wings, feet, and hat.
Make sure all pieces are firmly sewn.
Your adorable crochet strawberry duck is complete!
Helpful Tips for Beginners
1. Choose Soft Yarn
Cotton and acrylic yarn are excellent options for creating neat stitches and a smooth amigurumi finish.
2. Use Stitch Markers
Stitch markers help you keep track of rounds, especially when working with small amigurumi pieces.
3. Keep Your Tension Consistent
Even stitches help maintain the shape of the duck and prevent stuffing from showing through.
4. Stuff Gradually
Add small amounts of stuffing to create a rounded shape without stretching the stitches too much.
5. Pin Pieces Before Sewing
Position the wings, feet, beak, and cheeks before attaching them permanently.
This helps create a balanced and symmetrical appearance.
5 Cute Crochet Duck Hat Ideas
Once you’ve made your strawberry duck, try creating more adorable fruit-inspired versions!
1. Blueberry Duck
Use blue yarn for the hat and add tiny green leaves.
2. Watermelon Duck
Create a pink and green hat with small black embroidered seeds.
3. Lemon Duck
Use bright yellow yarn for a cheerful citrus-inspired hat.
4. Peach Duck
Combine soft peach yarn with a small green leaf.
5. Pumpkin Duck
Use orange yarn with a green stem for an adorable autumn-inspired design.
Creative Ways to Use Your Crochet Strawberry Duck
This cute handmade duck can be used in many different ways.
Handmade Birthday Gift
Create a personalized strawberry duck for someone who loves cute animals and fruity designs.
Spring and Summer Decorations
Display the duck on a shelf, desk, or decorative tray for a cheerful seasonal touch.
Amigurumi Collection
Make several ducks wearing different fruit hats to create a colorful handmade collection.
Crochet Photography
Use your finished strawberry duck in cozy craft photography or handmade product displays.
Handmade Gift Basket
Pair your strawberry duck with other small crochet animals and handmade accessories.
Frequently Asked Questions
Is this crochet strawberry duck pattern suitable for beginners?
Yes! This pattern uses basic stitches such as single crochet, increases, and decreases. Beginners who understand working in rounds should be able to follow the instructions.
What is the best yarn for crochet strawberry ducks?
Cotton yarn is great for stitch definition, while acrylic and chenille yarn can create a softer plush appearance.
How long does it take to crochet a strawberry duck?
Depending on your crochet experience, this project may take approximately 3–5 hours.
Can I make the strawberry hat removable?
Absolutely! Simply leave the hat unattached and adjust its size so it fits comfortably over the duck’s head.
Can I make a larger strawberry duck?
Yes! Use thicker yarn and a larger crochet hook to create a bigger plush duck.
Can I embroider the eyes instead of using safety eyes?
Yes! Embroidered eyes are a great alternative, especially for handmade toys intended for young children.
Final Thoughts
Creating your own easy crochet strawberry duck amigurumi is a fun and rewarding project that combines adorable animal designs with colorful fruit-inspired details.
With its soft yellow body, tiny orange feet, sweet pink cheeks, and bright red strawberry hat, this little duck is full of handmade charm.
Whether you’re making it as a thoughtful gift, adding it to your amigurumi collection, or simply enjoying a relaxing crochet project, this strawberry duck is sure to become a favorite.
Grab your favorite yarn, pick up your crochet hook, and start creating your own adorable strawberry duck today!
Love this crochet strawberry duck pattern? Save this tutorial to Pinterest so you can easily find it again and share it with your crochet-loving friends!