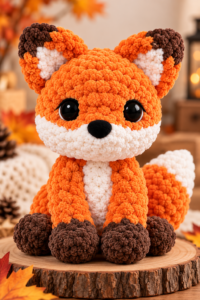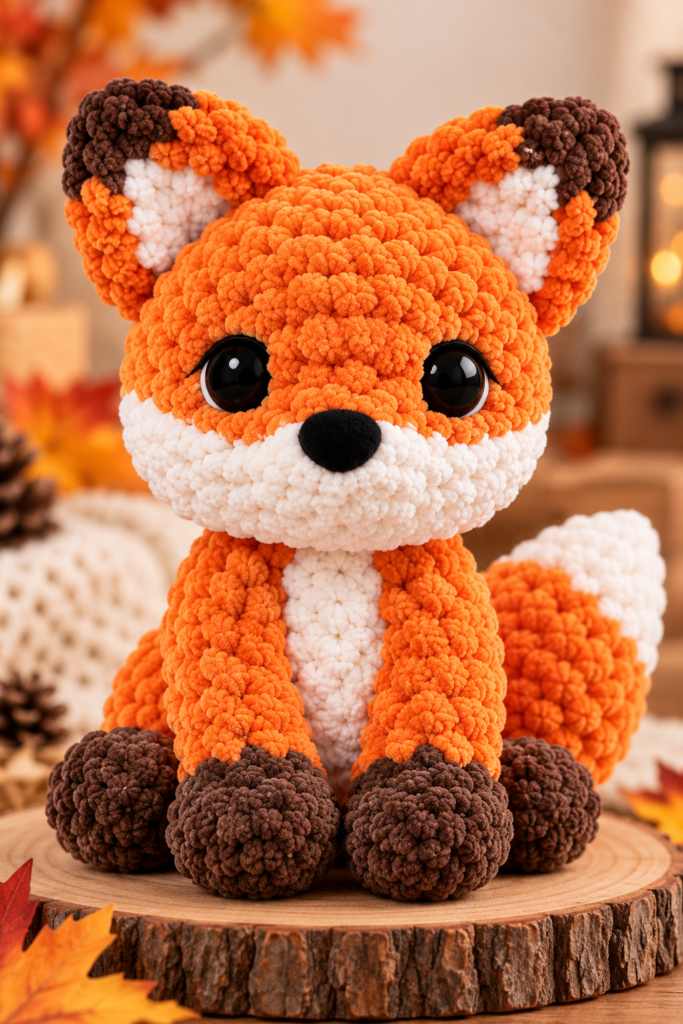
Looking for an adorable crochet project to add to your handmade collection? This easy crochet fox amigurumi pattern is the perfect choice! With its fluffy orange body, oversized ears, cute black eyes, white cheeks, and tiny brown paws, this little woodland fox is simply irresistible.
Whether you’re a beginner learning how to crochet animals or an experienced crocheter looking for your next cute project, this step-by-step crochet fox tutorial will help you create a beautiful handmade plushie.
Why You’ll Love This Crochet Fox Pattern
- Beginner-friendly: Made with simple crochet stitches.
- Soft and cuddly: Chunky chenille yarn gives the fox an adorable plush texture.
- Cute woodland design: Features oversized ears, fluffy cheeks, and a bushy tail.
- Perfect handmade gift: Great for birthdays, baby showers, and special occasions.
- Customizable: Choose different yarn colors to create your own unique fox.
Materials You’ll Need
Before starting your crochet fox, gather these supplies:
- Orange chenille yarn
- White chenille yarn
- Dark brown chenille yarn
- Black yarn for the nose
- 4.5–5.5 mm crochet hook
- 12–16 mm safety eyes
- Polyester fiberfill stuffing
- Yarn needle
- Stitch markers
- Scissors
Skill Level: Beginner to Intermediate
Estimated Time: 4–6 hours
Finished Size: Approximately 8–11 inches tall, depending on your yarn and hook size.
Crochet Abbreviations (US Terms)
- MR: Magic Ring
- SC: Single Crochet
- INC: Increase (2 SC in the same stitch)
- DEC: Invisible Decrease
- SL ST: Slip Stitch
- CH: Chain
- FO: Fasten Off
- BLO: Back Loop Only
Work in continuous rounds unless otherwise stated.
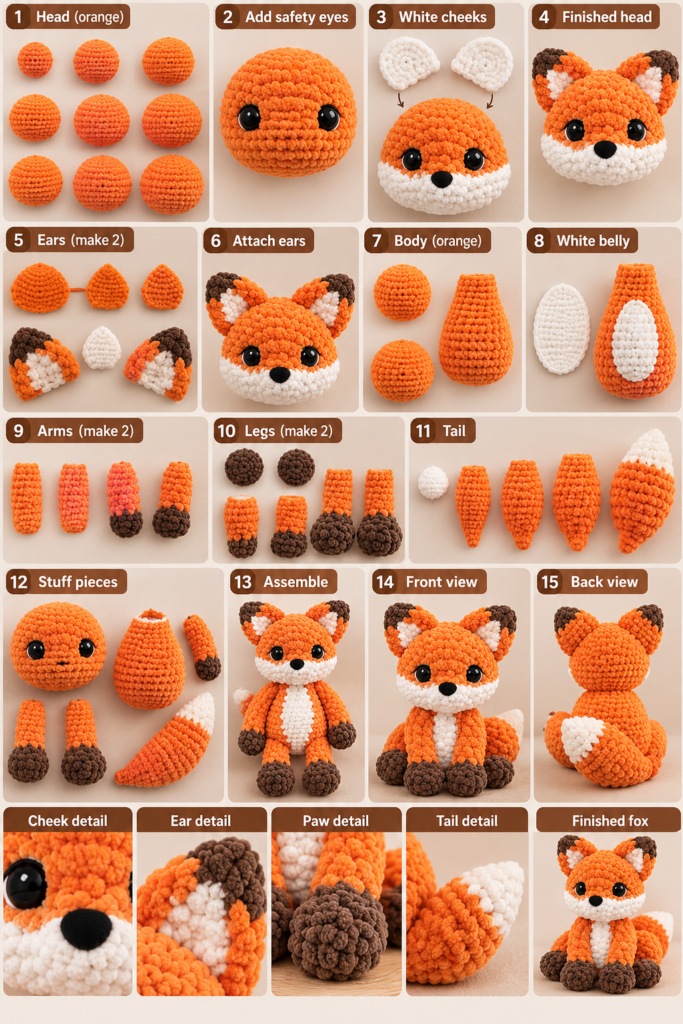
Step 1: Crochet the Fox Head
The head is the most important part of this adorable fox. Start with orange yarn to create a soft, rounded shape.
Using orange yarn:
- Round 1: 6 SC in MR (6)
- Round 2: INC around (12)
- Round 3: (1 SC, INC) × 6 (18)
- Round 4: (2 SC, INC) × 6 (24)
- Round 5: (3 SC, INC) × 6 (30)
- Round 6: (4 SC, INC) × 6 (36)
- Round 7: (5 SC, INC) × 6 (42)
- Round 8: (6 SC, INC) × 6 (48)
- Rounds 9–15: SC around (48)
- Round 16: (6 SC, DEC) × 6 (42)
- Round 17: (5 SC, DEC) × 6 (36)
- Round 18: (4 SC, DEC) × 6 (30)
- Round 19: (3 SC, DEC) × 6 (24)
- Round 20: (2 SC, DEC) × 6 (18)
Insert the safety eyes between rounds 11 and 12, approximately 8 stitches apart.
Stuff the head gradually to maintain its rounded shape.
- Round 21: (1 SC, DEC) × 6 (12)
- Round 22: DEC around (6)
Fasten off and close the opening.
Step 2: Make the White Fox Cheeks
The fluffy white cheeks give this crochet fox its adorable woodland appearance.
Make 2 pieces using white yarn:
- Round 1: 6 SC in MR (6)
- Round 2: INC around (12)
- Round 3: (1 SC, INC) × 6 (18)
- Round 4: SC around (18)
Fasten off, leaving a long tail for sewing.
Flatten each piece slightly and sew them onto the lower front of the fox’s head.
Position the cheeks just below the eyes, allowing them to meet in the center.
Adding the nose:
Use black yarn to embroider a small oval nose between the cheeks.
Add a tiny vertical stitch underneath for an extra-cute expression.
Step 3: Crochet the Fox Ears
The oversized triangular ears are one of the cutest features of this amigurumi fox.
Make 2 ears using orange yarn:
- Round 1: 4 SC in MR (4)
- Round 2: (1 SC, INC) × 2 (6)
- Round 3: (2 SC, INC) × 2 (8)
- Round 4: (3 SC, INC) × 2 (10)
- Round 5: (4 SC, INC) × 2 (12)
- Round 6: (5 SC, INC) × 2 (14)
- Round 7: (6 SC, INC) × 2 (16)
- Round 8: SC around (16)
Fasten off and leave a long tail.
For extra detail, crochet smaller white inner-ear pieces and attach them to the front.
Add dark brown yarn around the upper edges to recreate the adorable woodland fox appearance.
Sew both ears securely onto the top of the head.
Step 4: Crochet the Fox Body
The fox’s body should be slightly smaller than its head to create the classic cute amigurumi proportions.
Using orange yarn:
- Round 1: 6 SC in MR (6)
- Round 2: INC around (12)
- Round 3: (1 SC, INC) × 6 (18)
- Round 4: (2 SC, INC) × 6 (24)
- Round 5: (3 SC, INC) × 6 (30)
- Round 6: (4 SC, INC) × 6 (36)
- Rounds 7–12: SC around (36)
- Round 13: (4 SC, DEC) × 6 (30)
- Round 14: SC around (30)
- Round 15: (3 SC, DEC) × 6 (24)
- Round 16: SC around (24)
- Round 17: (2 SC, DEC) × 6 (18)
- Round 18: SC around (18)
Stuff the body firmly.
Fasten off, leaving a long yarn tail for assembly.
Adding the White Belly
Using white yarn, crochet a small oval patch.
- Chain 7.
- Starting in the second chain from the hook, work 5 SC.
- Work 3 SC into the last chain.
- Continue along the opposite side with 4 SC.
- Work 2 SC into the final chain.
Continue working around the oval, increasing at both ends until the patch reaches your desired size.
Sew the white belly patch onto the front of the body.
Step 5: Crochet the Fox Arms
The little front arms give your fox a sweet, cuddly appearance.
Make 2 arms using orange yarn:
- Round 1: 6 SC in MR (6)
- Round 2: INC around (12)
- Rounds 3–8: SC around (12)
- Round 9: (2 SC, DEC) × 3 (9)
- Rounds 10–11: SC around (9)
Lightly stuff the lower portion of each arm.
Fasten off and leave a long sewing tail.
Attach the arms to either side of the upper body, positioning them slightly forward.
For extra detail, add small dark brown paw caps.
Step 6: Make the Brown Fox Paws
The dark brown paws create a beautiful contrast with the fox’s bright orange body.
Make 2 legs:
Start with dark brown yarn.
- Round 1: 6 SC in MR (6)
- Round 2: INC around (12)
- Round 3: (1 SC, INC) × 6 (18)
- Rounds 4–5: SC around (18)
Change to orange yarn.
- Rounds 6–8: SC around (18)
- Round 9: (1 SC, DEC) × 6 (12)
- Rounds 10–11: SC around (12)
Stuff each leg lightly.
Fasten off and leave a long tail for sewing.
Attach both legs to the lower front of the body, making sure the brown paws face forward.
Step 7: Crochet the Fluffy Fox Tail
A cute crochet fox wouldn’t be complete without its signature bushy tail!
Start with white yarn:
- Round 1: 6 SC in MR (6)
- Round 2: (1 SC, INC) × 3 (9)
- Round 3: SC around (9)
Change to orange yarn.
- Round 4: (2 SC, INC) × 3 (12)
- Round 5: (3 SC, INC) × 3 (15)
- Round 6: (4 SC, INC) × 3 (18)
- Rounds 7–10: SC around (18)
- Round 11: (4 SC, DEC) × 3 (15)
- Round 12: (3 SC, DEC) × 3 (12)
- Round 13: (2 SC, DEC) × 3 (9)
Stuff the tail lightly.
Fasten off and sew it to the back of the fox.
Position the tail slightly to one side for a playful, natural appearance.
Step 8: Assemble Your Crochet Fox
Now it’s time to bring your adorable crochet fox to life!
- Sew the head securely onto the body.
- Attach both oversized ears to the top of the head.
- Position and sew the white cheeks underneath the eyes.
- Embroider the small black nose.
- Attach the arms to the upper body.
- Sew the brown-pawed legs onto the lower body.
- Attach the fluffy tail to the back.
- Adjust the stuffing and gently shape the plushie.
Congratulations! Your handmade crochet fox amigurumi is complete.
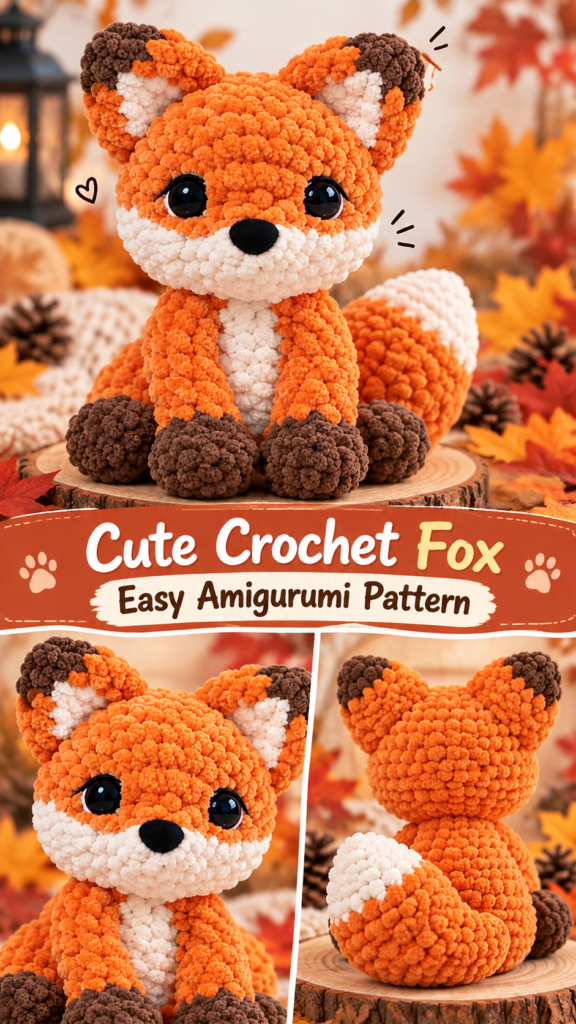
Pattern Note: This beginner-friendly pattern is inspired by the pictured fox. The finished plushie may vary slightly in shape and proportions depending on your yarn, tension, and assembly.
Helpful Tips for Beginners
1. Choose the Right Yarn
Chunky chenille yarn is perfect for achieving the soft, fluffy appearance of this crochet fox. Cotton or acrylic yarn can also work if you prefer more visible stitches.
2. Maintain Consistent Tension
Keeping your stitches even will help your fox maintain its shape and prevent stuffing from showing through the fabric.
3. Use Stitch Markers
Amigurumi is usually worked in continuous rounds, so stitch markers are essential for tracking your progress.
4. Stuff Carefully
Add stuffing gradually and distribute it evenly. Avoid overstuffing, as this can stretch the stitches and distort the shape.
5. Position the Pieces Before Sewing
Use pins to hold the ears, arms, and legs in place before attaching them permanently. This helps create a balanced and symmetrical finished fox.
For toys intended for babies or very young children, use embroidered eyes instead of plastic safety eyes.
4 Creative Crochet Fox Ideas to Try
Once you’ve completed your first fox, experiment with these adorable variations.
1. Mini Crochet Fox Keychain
Use thinner yarn and a smaller hook to make a miniature fox that can be attached to a backpack, purse, or keychain.
2. Sleeping Crochet Fox
Replace the round black eyes with embroidered closed eyes to create a peaceful sleeping fox.
3. Woodland Crochet Fox Family
Make several foxes in different sizes and colors to create an adorable woodland animal family.
4. Pastel Crochet Fox
Try soft pink, lavender, cream, or light brown yarn for a unique and whimsical version of the classic orange fox.
Frequently Asked Questions
Is this crochet fox pattern beginner-friendly?
Yes! This pattern uses basic crochet techniques such as single crochet, increases, and decreases. Beginners who understand how to work in continuous rounds can follow the instructions.
What is the best yarn for crochet fox amigurumi?
Soft chenille yarn is an excellent choice for making plush crochet animals. It creates a fluffy texture and gives the finished fox a cuddly appearance.
How long does it take to crochet a fox?
Most crocheters can complete this project in approximately 4–6 hours. Beginners may need additional time to practice stitches and assemble the pieces.
Can I make this crochet fox bigger or smaller?
Absolutely! Use thicker yarn and a larger crochet hook for a bigger plushie, or thinner yarn and a smaller hook for a miniature version.
How can I make my crochet fox sit upright?
Stuff the lower body evenly, attach the legs symmetrically, and position the tail to help balance the finished toy.
Final Thoughts
This easy crochet fox amigurumi pattern is a wonderful project for anyone who loves cute handmade animals. With its fluffy orange body, white cheeks, oversized ears, and adorable brown paws, this little woodland fox makes a charming addition to any crochet collection.
Whether you’re creating a handmade gift, decorating a nursery, or simply enjoying a relaxing crochet project, this fox is sure to bring joy and creativity to your day.
Grab your favorite yarn, pick up your crochet hook, and start making your own adorable woodland friend today!
Love this crochet fox pattern? Save it to Pinterest and share it with your crochet-loving friends so you can easily find it again for your next handmade project!