1. Introduction: A Festive Feast for the Eyes and Palate
There is something inherently magical about the holiday season that draws us back to the kitchen. It’s a time of year when food ceases to be mere sustenance and transforms into a medium for storytelling, warmth, and communal joy. Among the glittering lights and the scent of pine, the Pull-Apart Cheesy Christmas Tree Bread has emerged as a modern holiday classic—a dish that manages to be both a whimsical centerpiece and a comforting, decadent snack.
The origin of “pull-apart” bread, often referred to as “monkey bread” in its sweet iterations, dates back to mid-century American baking. However, the savory transformation into a Christmas tree shape is a testament to culinary creativity. This recipe combines the rustic charm of homemade dough with the sophisticated punch of garlic-herb butter and the irresistible stretch of melted mozzarella.
Whether you are hosting a formal Christmas Eve dinner or a casual holiday movie night, this bread serves as the ultimate icebreaker. There is a primal, joyful satisfaction in reaching out and “plucking” a warm, golden ornament of bread from the tree, revealing a hidden pocket of molten cheese. It’s more than a recipe; it’s an interactive holiday experience.
2. Recipe Overview
- Cuisine Type: American-Italian Fusion / Festive Appetizer
- Difficulty Level: Intermediate (requires basic dough handling)
- Total Prep Time: 2 hours (includes rising time)
- Cooking Time: 20–25 minutes
- Dietary Classifications: Vegetarian. (Can be modified for Vegan or Gluten-Free diets with specific substitutions).
3. Equipment and Tools
To achieve the perfect bake and that iconic conical tree shape, you will need the following kitchen essentials:
- Large Baking Sheet: Preferably a half-sheet pan (18 x 13 inches) to allow the “tree” to spread.
- Parchment Paper: Essential for preventing the cheese from sticking to the pan.
- Mixing Bowls: One large bowl for dough proofing and a small microwave-safe bowl for the garlic butter.
- Stand Mixer: Equipped with a dough hook (optional, but recommended for consistent texture).
- Kitchen Scale: For precise measurements, especially when dividing the dough into equal “ornaments.”
- Pastry Brush: For applying the egg wash and the final herb butter glaze.
- Pizza Cutter or Bench Scraper: For clean, even dough portions.
4. Serving Suggestions
Presentation is everything when it comes to a themed dish.
Plating and Garnish
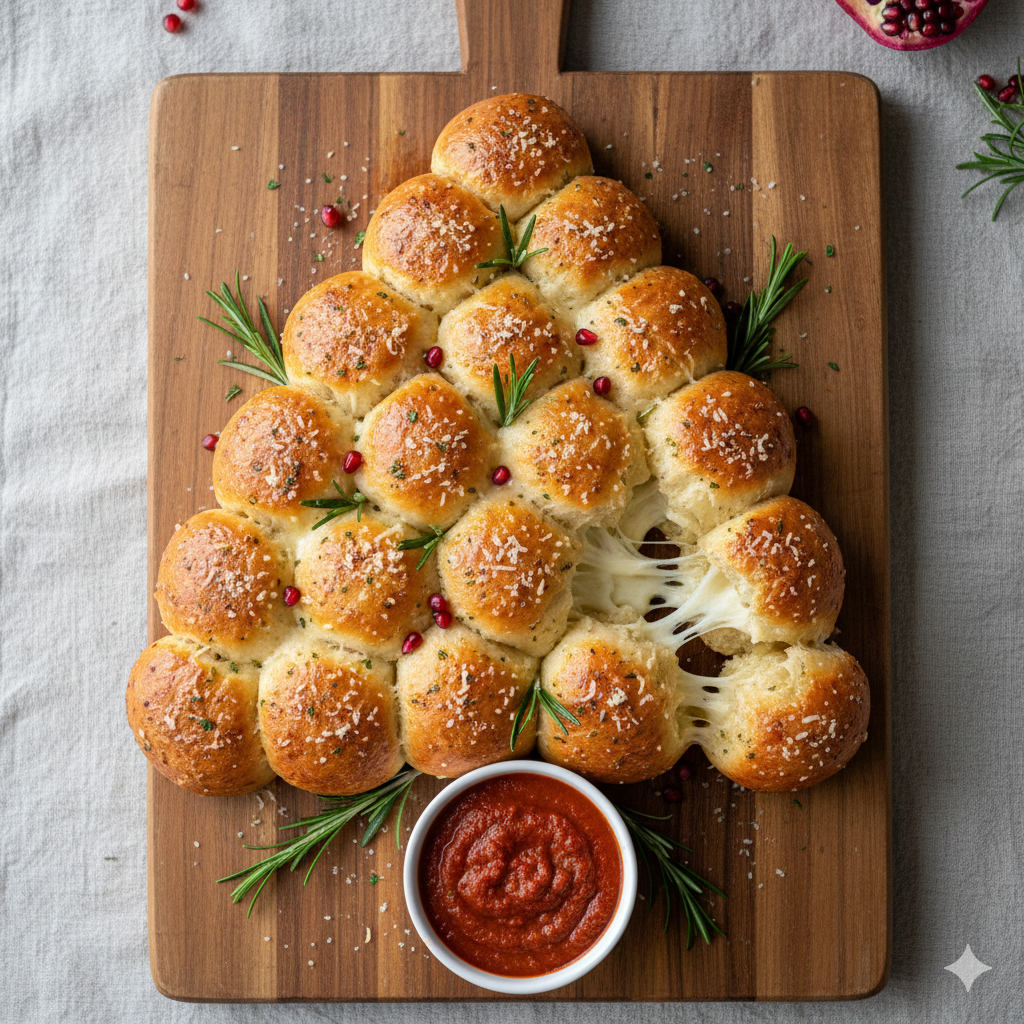
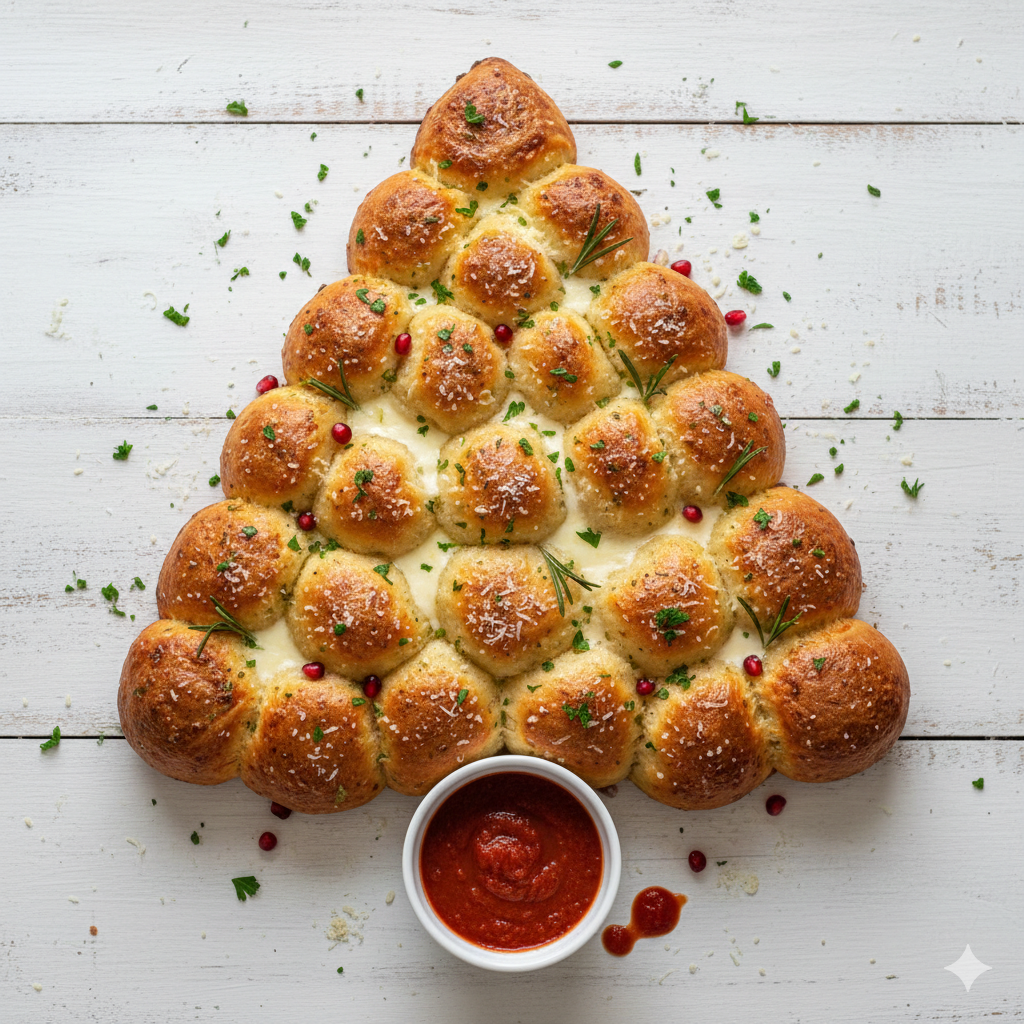
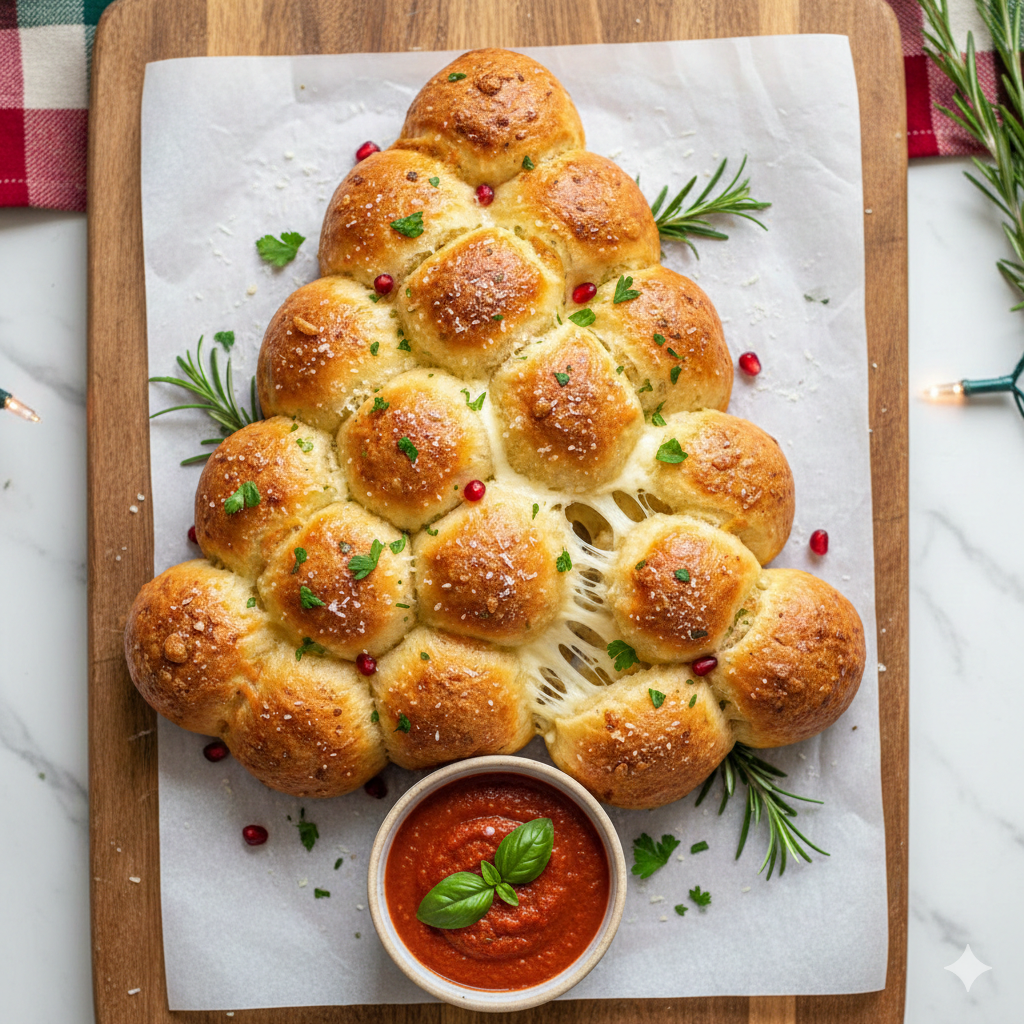
Once the bread is out of the oven, garnish it with fresh rosemary sprigs tucked between the “branches” to mimic pine needles. A sprinkle of pomegranate seeds can act as red ornaments, providing a burst of acidity to cut through the rich cheese.
Complementary Sides
- Marinara Sauce: A warm bowl of rich tomato sauce at the base of the tree acts as a “tree stand” and a perfect dipping companion.
- Pesto: A vibrant green basil pesto offers a fresh, nutty contrast.
Beverage Pairings
- Wine: A crisp Pinot Grigio or a light Prosecco balances the fattiness of the cheese. For red lovers, a Chianti pairs beautifully with the garlic and herbs.
- Non-Alcoholic: Sparkling apple cider or a rosemary-infused lemonade.
5. Nutritional Information (Per Serving)
Note: Based on a yield of 30 dough balls.
| Nutrient | Amount |
| Calories | 185 kcal |
| Total Fat | 9g |
| Saturated Fat | 5g |
| Cholesterol | 25mg |
| Sodium | 310mg |
| Total Carbohydrates | 19g |
| Protein | 7g |
Health Benefits: While an indulgent treat, the inclusion of fresh garlic provides antioxidants, and the homemade dough avoids the preservatives found in store-bought refrigerated cans.
6. Storage and Reheating
Refrigeration
Store leftovers in an airtight container for up to 3 days.
Freezing
You can freeze the baked tree (once completely cooled) by wrapping it tightly in plastic wrap and then foil. It will stay fresh for up to 1 month.
Reheating
To maintain the texture, avoid the microwave if possible.
- Oven (Recommended): Wrap in foil and bake at 350°F (175°C) for 10–12 minutes until the cheese is stretchy again.
- Air Fryer: Heat at 320°F for 3–5 minutes for a crispier exterior.
7. Expert Tips and Variations
Professional Chef Tips
- The Temperature Factor: Ensure your water is between 105°F and 115°F. Too hot will kill the yeast; too cold won’t activate it.
- Don’t Rush the Rise: A slow rise in a warm, draft-free area ensures a light, airy crumb.
- The Cheese Seal: When stuffing the dough balls, pinch the seams tightly. If there’s a gap, the cheese will escape, leaving you with hollow bread.
Creative Variations
- The Pizza Tree: Add a slice of pepperoni inside each ball along with the cheese.
- The Pesto Tree: Brush the dough with basil pesto before baking for a vibrant green “evergreen” look.
- Sweet Version: Swap the garlic and cheese for cinnamon sugar and cream cheese filling, drizzling with icing after baking.
8. Ingredients Section
For the Dough
- Warm Water: 1 cup (240ml)
- Honey or Sugar: 1 tbsp (to feed the yeast)
- Active Dry Yeast: 2 ¼ tsp (1 standard packet)
- Unsalted Butter: 3 tbsp (45g), melted and cooled
- All-Purpose Flour: 3 to 3 ½ cups (approx. 400-450g)
- Salt: 1 tsp
For the Filling and Topping
- Mozzarella Cheese: 10 oz (280g) block, cut into ¾ inch cubes (approx. 30 cubes)
- Egg: 1 large (for egg wash)
- Unsalted Butter: ¼ cup (56g), melted
- Garlic: 3 cloves, minced fine
- Fresh Parsley: 2 tbsp, chopped
- Parmesan Cheese: ¼ cup, finely grated
9. Step-by-Step Instructions
Step 1: Activate the Yeast
In the bowl of a stand mixer, combine the warm water, honey, and yeast. Let it sit for about 5–10 minutes until it becomes foamy. If it doesn’t foam, your yeast may be expired.
Step 2: Mix the Dough
Add the melted butter, salt, and 2 cups of flour. Use the dough hook to mix on low speed. Gradually add the remaining flour until the dough pulls away from the sides of the bowl.
Step 3: The Knead
Knead the dough for 5 minutes on medium-low speed (or 8 minutes by hand) until smooth and elastic. It should be slightly tacky but not sticky.
Step 4: First Rise
Place the dough in a lightly greased bowl. Cover with a damp cloth and let rise in a warm spot for 60 minutes or until doubled in size.
Step 5: Assembly
Deflate the dough and divide it into 30–32 equal pieces (roughly 1 ounce or 28g each). Flatten a piece of dough, place a cube of mozzarella in the center, and wrap the dough around it, pinching the bottom firmly to seal.
Step 6: Shaping the Tree
On your parchment-lined baking sheet, arrange the balls in a triangle shape to form the tree.
- Start with 1 ball at the top.
- Row 2: 2 balls.
- Row 3: 3 balls… and so on until the base.
- Use the remaining 2–3 balls to create a “trunk” at the bottom.
Step 7: Second Rise & Egg Wash
Cover the tree loosely and let rise for another 20 minutes. Meanwhile, preheat your oven to 400°F (200°C). Brush the tree with a beaten egg mixed with a splash of water.
Step 8: Bake
Bake for 18–22 minutes or until the bread is deeply golden brown.
Step 9: The Final Glaze
While baking, mix the melted butter, minced garlic, and parsley. As soon as the bread leaves the oven, brush this mixture generously over the hot bread. Sprinkle with Parmesan cheese immediately.
10. Frequently Asked Questions (FAQ)
Q: Can I use store-bought pizza dough?
A: Absolutely! Two 16-oz balls of store-bought dough will work perfectly and save time.
Q: Why did my cheese leak out?
A: This usually happens if the dough is too thin at the bottom or the seam wasn’t pinched tightly enough. Ensure a uniform thickness when wrapping.
Q: Can I make this ahead of time?
A: You can assemble the tree, cover it tightly with plastic wrap, and refrigerate it overnight. Let it come to room temperature for 30 minutes before baking.
Q: How do I know when the dough is finished kneading?
A: Use the “windowpane test.” Take a small piece of dough and stretch it. If you can stretch it thin enough to see light through it without it tearing, the gluten is properly developed.
Q: My bread is browning too fast! What should I do?
A: If the tips of the “branches” are getting dark but the center is pale, tent the tree loosely with aluminum foil for the final 5-10 minutes of baking.
