1. Introduction
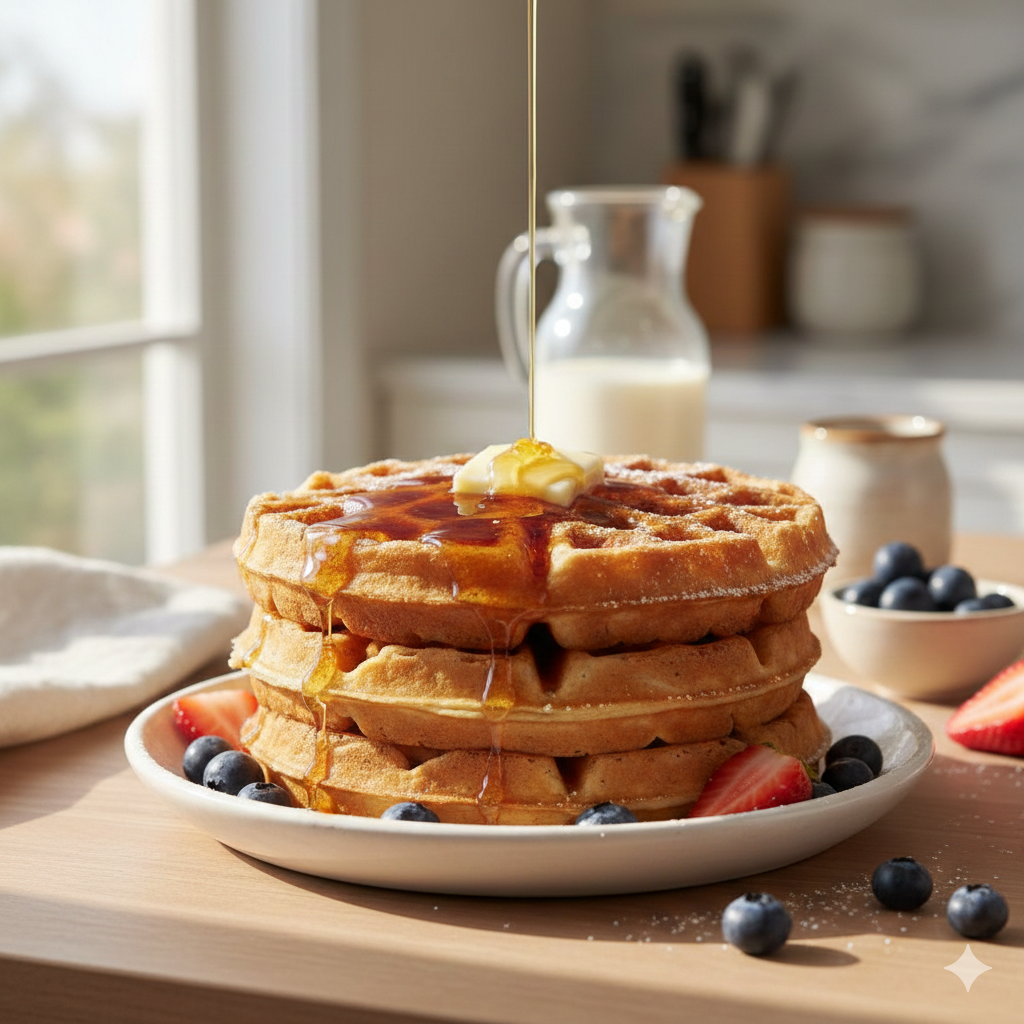
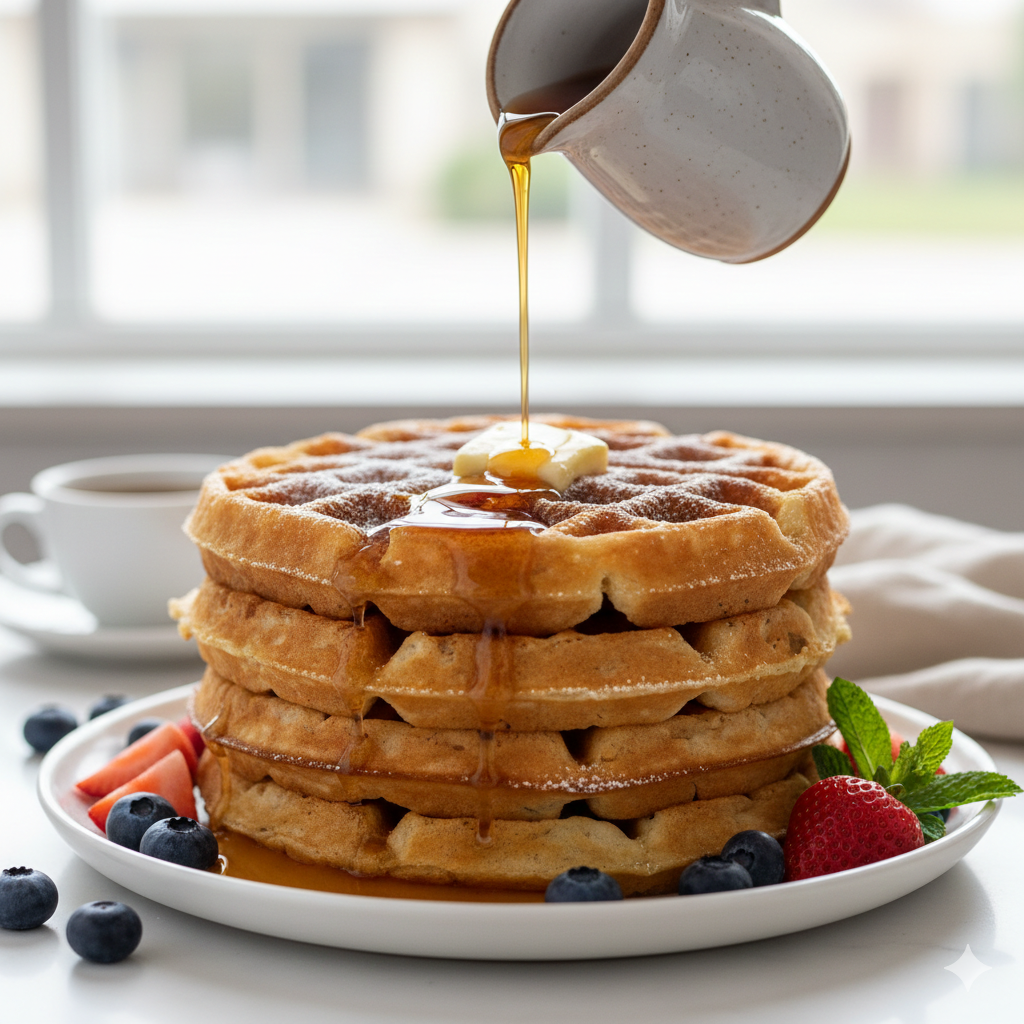
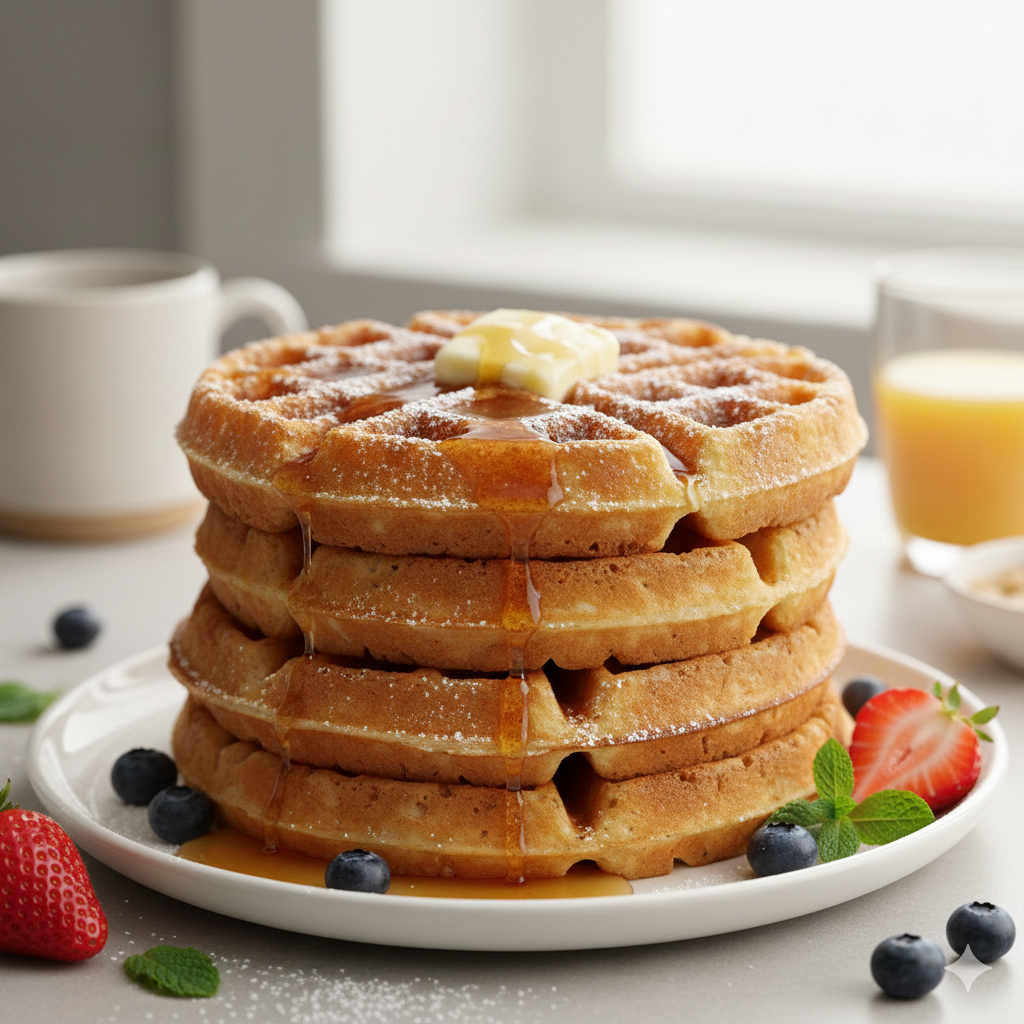
There is a specific kind of magic that happens on a Sunday morning when the scent of toasted butter and vanilla begins to waft through the hallways. Waffles are more than just a breakfast item; they are a culinary hug. While their cousin, the pancake, is soft and humble, the waffle is a structural masterpiece—designed with golden ridges and deep pockets specifically engineered to hold “pools” of molten maple syrup and melting butter.
The history of the waffle dates back to the Middle Ages, where “wafer” irons were used to cook thin, crisp cakes over open fires. Over centuries, particularly in Belgium and later America, these evolved into the leavened, fluffy-yet-crunchy delights we crave today. Whether you are reliving a childhood memory of a roadside diner or looking to impress guests at a sophisticated brunch, mastering the homemade waffle is a rite of passage for any home cook. This recipe isn’t just about mixing batter; it’s about achieving that elusive contrast: a shatteringly crisp exterior that gives way to a cloud-like, tender center.
2. Recipe Overview
- Cuisine Type: American / Belgian-style fusion
- Difficulty Level: Easy to Intermediate
- Prep Time: 15 minutes
- Cook Time: 20 minutes (depending on iron size)
- Total Time: 35 minutes
- Dietary Classifications: Vegetarian (Nut-free; can be adapted for Gluten-Free or Dairy-Free)
3. Equipment and Tools
To achieve professional-grade results, the right hardware is essential.
- Waffle Iron: A high-quality Belgian waffle iron (with deep grids) or a standard classic iron.
- Mixing Bowls: Two large bowls (one for dry ingredients, one for wet).
- Whisk: A wire whisk for aerating the flour and incorporating the eggs.
- Measuring Tools: A full set of dry measuring cups and liquid measuring glass.
- Silicone Spatula: For folding the batter without overmixing.
- Wire Cooling Rack: Crucial for preventing sogginess after cooking.
- Ladle or Measuring Cup (1/2 cup size): For consistent portioning.
4. Serving Suggestions
The waffle is a canvas. While classic syrup is grand, consider these elevated pairings:
- The Classicist: High-quality Grade A salted butter and 100% pure Grade A amber maple syrup.
- The Berry Bliss: Macerated strawberries, fresh blueberries, and a dollop of chantilly cream (whisked heavy cream with powdered sugar and vanilla).
- The Savory Twist: Crispy fried chicken thighs, a drizzle of hot honey, and chopped chives.
- Garnish Ideas: A dusting of powdered sugar, lemon zest, or toasted pecans.
- Beverage Pairings: A robust Colombian dark roast coffee, a fresh mimosa, or a sparkling hibiscus iced tea for a non-alcoholic floral touch.
5. Nutritional Information
(Values are approximate per serving of one large Belgian waffle)
- Calories: 310 kcal
- Total Fat: 14g
- Saturated Fat: 8g
- Cholesterol: 75mg
- Sodium: 420mg
- Total Carbohydrates: 38g
- Protein: 8g
Health Benefits: When made at home, you control the quality of fats and sugars. Using pasture-raised eggs provides Omega-3 fatty acids, and opting for whole-grain flour can increase fiber content significantly.
6. Storage and Reheating
Never throw away leftover waffles! They are the ultimate “homemade frozen waffle” replacement.
- Refrigeration: Store in an airtight container for up to 3 days.
- Freezing: Place cooled waffles in a single layer on a baking sheet to flash-freeze for 1 hour, then transfer to a heavy-duty freezer bag. They last up to 2 months.
- Reheating: Avoid the microwave, as it makes them rubbery. Use a toaster or a preheated oven at 175°C (350°F) for 5 minutes until the exterior regains its crunch.
7. Expert Tips and Variations
- The Cornstarch Secret: Replace 1/4 cup of the flour with cornstarch. This lowers the gluten content and creates a “shatter-crisp” crust.
- Don’t Overmix: Small lumps in the batter are your friends. Over-whisking develops gluten, leading to tough, bready waffles rather than light, airy ones.
- Room Temperature Ingredients: Ensure your milk and eggs aren’t ice-cold so the melted butter doesn’t seize up into clumps.
- Variation – Chocolate Chip: Fold in 1/2 cup of mini semi-sweet chocolate chips at the very end.
- Variation – Savory Herb: Omit the sugar and vanilla; add 1/4 cup of grated parmesan and 1 tablespoon of fresh rosemary.
8. Ingredients Section
| Ingredient | Imperial Measurement | Metric Measurement | Substitution Note |
| All-Purpose Flour | 2 cups | 250g | Or 1:1 GF Flour Blend |
| Cornstarch | 1/4 cup | 32g | For extra crispiness |
| Baking Powder | 1 tbsp | 12g | Ensure it is fresh |
| Salt | 1/2 tsp | 3g | Fine sea salt preferred |
| Granulated Sugar | 2 tbsp | 25g | Or coconut sugar |
| Large Eggs | 2 | 2 | Separated (see tips) |
| Whole Milk | 1 3/4 cups | 415ml | Or buttermilk for tang |
| Unsalted Butter | 1/2 cup (1 stick) | 115g | Melted and slightly cooled |
| Vanilla Extract | 1 tsp | 5ml | Pure extract only |
9. Step-by-Step Instructions
- Prep the Station: Preheat your waffle iron to its medium-high setting. If your oven has a “warm” setting, turn it on and place a wire rack inside a baking sheet—this will keep finished waffles crisp while you cook the rest.
- Dry Ingredients: In a large bowl, whisk together the flour, cornstarch, baking powder, salt, and sugar. Sifting is optional but recommended if your flour is clumpy.
- Wet Ingredients: In a separate medium bowl, whisk the egg yolks, milk, melted butter, and vanilla until combined.
- The “Pro” Step (Optional but Recommended): In a small, clean bowl, beat the egg whites until stiff peaks form. This incorporates air into the batter for a souffle-like interior.
- Combine: Pour the wet ingredients into the dry ingredients. Use a spatula to fold gently until just combined. If using the beaten egg whites, fold them in last very gently.
- The Rest: Let the batter sit for 5 minutes. This allows the flour to hydrate and the baking powder to activate.
- Cook: Lightly grease the iron with oil spray or melted butter. Pour about 1/2 to 2/3 cup of batter (check your iron’s manual) into the center.
- Visual Cue: Close the lid. Do not peek! Wait until the steam stops escaping the sides of the iron—this is the universal signal that the waffle is done.
- Finish: Remove with a silicone fork or tongs and place immediately on the wire rack in the warm oven.
10. Frequently Asked Questions (FAQ)
Q: Why are my waffles soggy?
A: This usually happens if you stack them on a plate immediately. The steam from the bottom waffle softens the one on top. Always use a wire cooling rack!
Q: Can I use this batter for pancakes?
A: Yes, though waffle batter generally has more fat (butter/oil) than pancake batter to ensure the crispy exterior.
Q: My waffle is sticking to the iron. What do I do?
A: Ensure your iron is hot enough before pouring. Also, check if your batter has enough fat. If the iron is older, it may need a light coating of high-smoke-point oil (like grapeseed).
Q: Is buttermilk better than regular milk?
A: Buttermilk provides a lovely tang and reacts with the baking powder for a higher rise. If you use buttermilk, add 1/2 tsp of baking soda to the dry ingredients to neutralize the acid.
Q: How do I know when the iron is ready?
A: Most modern irons have an indicator light. If yours doesn’t, flick a tiny drop of water onto the plates; if it sizzles and dances, you’re ready to cook.
