1. Introduction: A Love Letter to the Breakfast Table
There is a specific kind of magic that happens on a slow Saturday morning when the scent of sizzling butter and sweet batter begins to waft through the house. The Old Fashioned Pancake is more than just a breakfast staple; it is a culinary hug, a timeless tradition that bridges the gap between generations.
In a world of “instant” everything and frozen toaster waffles, the art of the scratch-made pancake has become a quiet act of rebellion—and a delicious one at that. The recipe we are diving into today isn’t about trendy “soufflé” techniques or complicated folds. Instead, it honors the classic American diner-style flapjack: thick, incredibly soft, and structurally sound enough to hold a lake of pure maple syrup.
Historically, the “griddle cake” has existed for centuries, but the “Old Fashioned” style we crave today rose to prominence in the early 20th century. It relies on the chemical reaction between acidic buttermilk (or soured milk) and leavening agents to create those iconic tiny air bubbles. This recipe focuses on achieving that perfect golden-brown crust while maintaining a center that is as light as a cloud. Whether you’re cooking for a crowd or treating yourself to a solo brunch, these pancakes are the gold standard.
2. Recipe Overview
- Cuisine Type: American Breakfast
- Difficulty Level: Easy (Beginner-friendly)
- Prep Time: 10 minutes
- Cook Time: 15 minutes
- Total Time: 25 minutes
- Dietary Classifications: Vegetarian (Contains dairy and gluten)
3. Equipment and Tools
To achieve pancake perfection, having the right gear is just as important as the ingredients.
- Large Mixing Bowl: For the dry ingredients.
- Medium Mixing Bowl: To whisk the wet ingredients.
- Fine-Mesh Sieve: Essential for sifting flour to ensure zero lumps and maximum fluff.
- Whisk: A sturdy balloon whisk for aerating the batter.
- 12-inch Non-Stick Skillet or Cast Iron Griddle: A flat, heavy-bottomed surface ensures even heat distribution.
- Silicone or Thin Metal Spatula: A wide “flipper” style is best for getting under the pancake without tearing the edges.
- Measuring Cups and Spoons: For precision (volume measurements provided below).
- Wire Cooling Rack: To prevent the bottom of the pancakes from getting soggy while you finish the batch.
4. Serving Suggestions
A pancake is a blank canvas. While a pat of butter and syrup is the classic choice, consider these elevated pairings:
Plating & Garnish
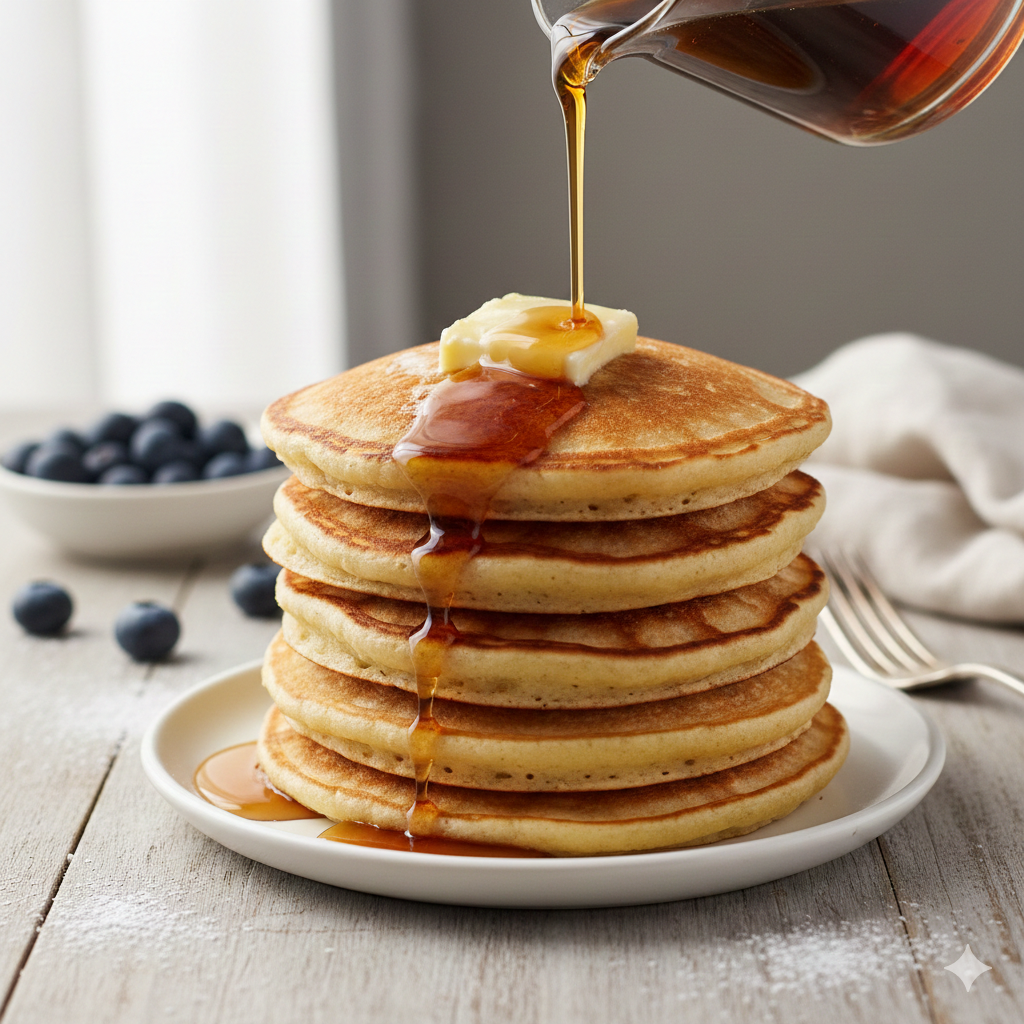
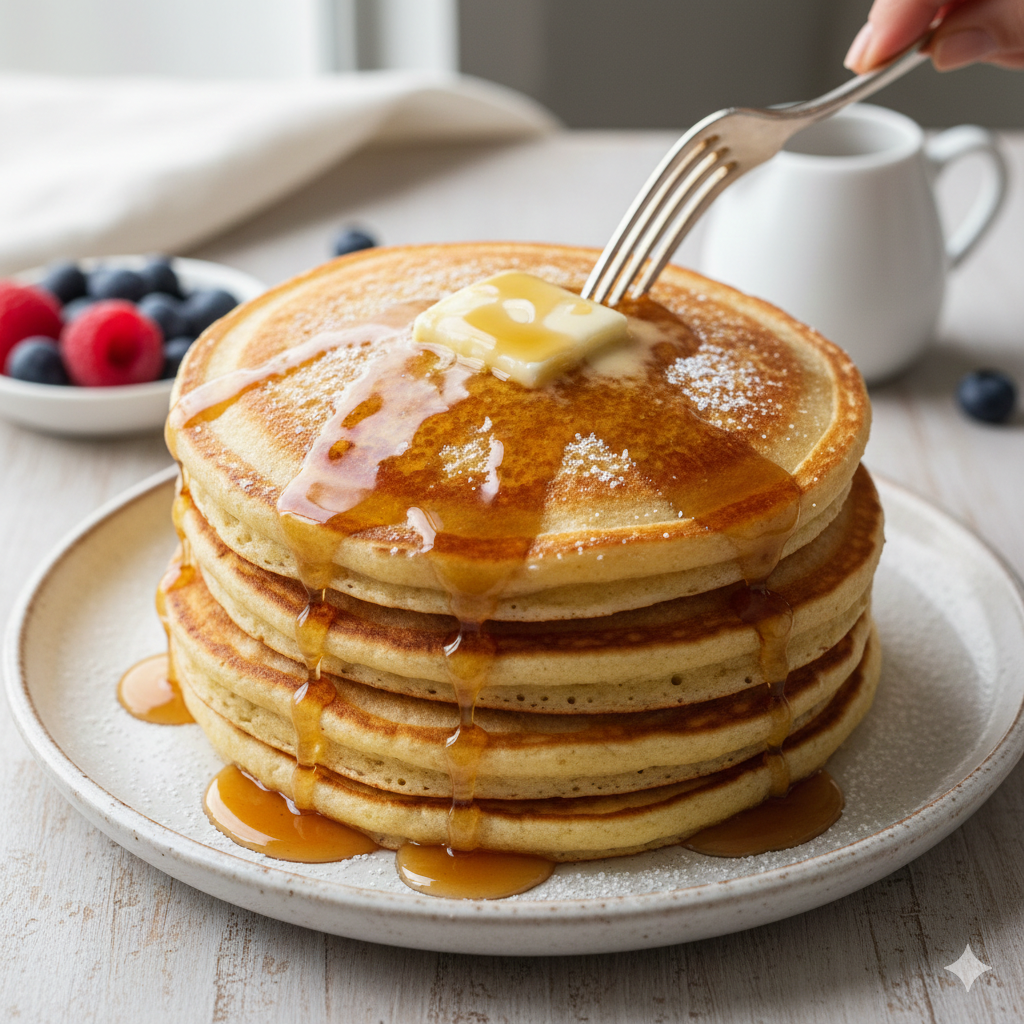
- The Classic Stack: Three to four pancakes, topped with a generous cube of salted grass-fed butter and a dusting of powdered sugar.
- Fresh Berry Compote: Simmer blueberries or raspberries with a splash of lemon juice and sugar until thickened.
- Whipped Honey Butter: Whip softened butter with honey and a pinch of cinnamon.
Complementary Sides
- Savory: Thick-cut applewood smoked bacon or spicy breakfast sausage links.
- Light: A side of Greek yogurt with a sprinkle of granola or a simple citrus salad (grapefruit and orange segments).
Beverage Pairings
- Coffee: A medium-roast Colombian coffee or a frothy vanilla latte.
- Tea: Earl Grey with a splash of milk.
- Juice: Freshly squeezed orange juice or a tart cranberry-apple blend.

5. Nutritional Information
Per Serving (approx. 2 pancakes):
| Nutrient | Amount |
| Calories | 320 kcal |
| Total Fat | 12g |
| Saturated Fat | 7g |
| Cholesterol | 65mg |
| Sodium | 480mg |
| Total Carbohydrates | 44g |
| Dietary Fiber | 1.5g |
| Sugars | 8g |
| Protein | 9g |
Health Note: These pancakes provide a solid energy boost for your morning. For a healthier twist, you can substitute half the flour with whole wheat or use a natural sweetener like monk fruit.
6. Storage and Reheating
Pancakes are surprisingly meal-prep friendly!
- Refrigeration: Store leftover pancakes in an airtight container for up to 3 days.
- Freezing: This is the best way to preserve texture. Place a piece of parchment paper between each pancake, stack them, and place them in a heavy-duty freezer bag. They stay fresh for 2 months.
- Reheating:
- Toaster (Recommended): Pops them right back to life with a slightly crisp exterior.
- Oven: Place on a baking sheet at 350°F (175°C) for 5-8 minutes, covered with foil to prevent drying.
- Microwave: 30 seconds on high (best for a soft, quick snack, though they may become slightly chewy).
7. Expert Tips and Variations
Professional Chef Tips
- Don’t Overmix: This is the #1 mistake. Stir until the flour streaks disappear, but leave the lumps. Overmixing develops gluten, which leads to tough, rubbery pancakes.
- The “Sizzle Test”: Flick a drop of water onto the pan. If it dances and evaporates immediately, the pan is ready.
- Wipe the Pan: Between batches, wipe the skillet with a dry paper towel and add fresh butter/oil to prevent burnt bits from sticking to the next round.
Creative Variations
- Lemon Poppy Seed: Add 1 tablespoon of lemon zest and 1 teaspoon of poppy seeds to the batter.
- Chocolate Chip Bliss: Sprinkle mini chocolate chips onto the pancake after pouring the batter onto the griddle (this prevents the chocolate from burning against the pan).
- High Protein: Stir in 1/2 cup of cottage cheese or a scoop of vanilla protein powder.
8. Ingredients Section
The Dry Mix
- All-Purpose Flour: 1 ½ cups (190g). Use a high-quality unbleached flour.
- Baking Powder: 3 ½ teaspoons. (Ensure it is fresh for maximum lift!)
- Salt: 1 teaspoon. (Fine sea salt or table salt).
- White Sugar: 1 tablespoon. (Just enough to help with browning).
The Wet Mix
- Milk: 1 ¼ cups (300ml). Whole milk is preferred for richness.
- Egg: 1 large, room temperature.
- Butter: 3 tablespoons (45g), melted and slightly cooled.
- Vanilla Extract: 1 teaspoon. (Optional, but highly recommended for aroma).
Substitutions
- Dairy-Free: Use almond or oat milk and melted coconut oil.
- Buttermilk Swap: If you don’t have buttermilk, add 1 tablespoon of lemon juice to your regular milk and let it sit for 5 minutes before using.
9. Step-by-Step Instructions
- Sift the Dry Ingredients: In a large bowl, sift together the flour, baking powder, salt, and sugar. This incorporates air and removes clumps.
- Whisk the Wet Ingredients: In a separate bowl, whisk the egg until frothy. Add the milk, melted butter, and vanilla. Whisk until well combined.
- The Well Method: Make a “well” in the center of the dry ingredients. Pour the wet mixture into the center.
- Combine (The Golden Rule): Using a spatula or whisk, gently fold the ingredients together. Stop as soon as the large streaks of flour are gone. Small lumps are your friends!
- The Rest Period: Let the batter sit for 5 minutes. This allows the baking powder to activate and the flour to hydrate. You will see small bubbles forming on the surface.
- Heat the Surface: Heat your griddle over medium heat. Lightly grease with a small amount of butter or neutral oil.
- The Pour: Use a 1/4 cup measuring cup to scoop batter onto the griddle. This ensures uniform size and even cooking.
- The Bubble Watch: Cook for about 2-3 minutes. Watch for bubbles to form on the surface and pop. When the edges look set and matte (not shiny), it’s time to flip.
- The Flip: In one confident motion, slide the spatula under and flip. Cook the second side for 1-2 minutes until golden brown.
- Keep Warm: Place finished pancakes on a wire rack in a warm oven (200°F) while you finish the rest of the batter.
10. Frequently Asked Questions (FAQ)
Q: Why are my pancakes flat?
A: Your baking powder might be expired, or you may have overmixed the batter, which “deflates” the air bubbles created by the leavening agent.
Q: Can I make the batter the night before?
A: It is not recommended for this specific recipe. The baking powder begins reacting immediately. If left overnight, the pancakes won’t rise properly. However, you can mix the dry ingredients ahead of time!
Q: My pancakes are burnt on the outside but raw in the middle. Help!
A: Your heat is too high. Pancakes require a “medium” or “medium-low” heat to allow the center to cook through by the time the exterior is golden.
Q: Can I use whole wheat flour?
A: Yes, but the pancakes will be denser. We recommend a 50/50 split of whole wheat and all-purpose flour for the best texture.
Q: What is the best oil for frying?
A: Butter provides the best flavor, but it has a low smoke point. A mix of half butter and half neutral oil (like canola) is the professional secret for flavor without burning.
