1. Introduction: The Quiet Magic of the Mason Jar
There is a specific kind of morning peace that comes from knowing breakfast is already finished before you even wake up. In the fast-paced modern world, where the snooze button is our best friend and the “morning rush” feels more like a tactical maneuver, Overnight Oats have emerged as the undisputed champion of the breakfast table.
But this isn’t just a TikTok trend or a passing fitness fad. The concept of soaking grains dates back centuries—most notably to Bircher Muesli, developed around 1900 by Swiss physician Maximilian Bircher-Benner for patients in his hospital. He believed a diet of raw fruit and grains was the key to healing. Today, we’ve evolved that philosophy into a customizable, portable, and infinitely delicious canvas of flavor.
The beauty of overnight oats lies in the science of cold-soaking. Unlike traditional oatmeal cooked over a stove, which uses heat to break down starches, overnight oats use time. As the oats sit in liquid, they undergo a slow hydration process that results in a creamy, dense texture that is easier on the digestive system and preserves the integrity of the grain’s nutrients. Whether you are a busy professional, a parent on the go, or an athlete looking for sustained energy, this dish is your secret weapon.
2. Recipe Overview
- Cuisine Type: Modern International / Health-Focused
- Difficulty Level: Beginner (No-cook)
- Prep Time: 5–10 minutes
- Setting Time: 6–12 hours (Overnight)
- Dietary Classifications: Vegetarian, Vegan-friendly, Gluten-Free (if using certified oats), High-Fiber.
3. Equipment and Tools
To achieve the perfect consistency and ensure your oats stay fresh, the right “vessel” matters.
- Primary Container: 16 oz (approx. 475ml) Wide-mouth Mason Jars. The wide mouth allows for easy stirring and layering.
- Measuring Tools: A standard set of dry measuring cups (1/2 cup and 1/4 cup) and measuring spoons for seeds and sweeteners.
- Mixing Utensils: Long-handled silicone spatulas or heavy-duty spoons to ensure no dry pockets of oats remain at the bottom.
- Specifications:
- Volume: Ensure your jar has at least 2 inches of “headspace” above the oat mixture to allow for expansion and the addition of toppings in the morning.
- Seal: Airtight lids (BPA-free plastic or metal) are essential to prevent the oats from absorbing “fridge smells.”
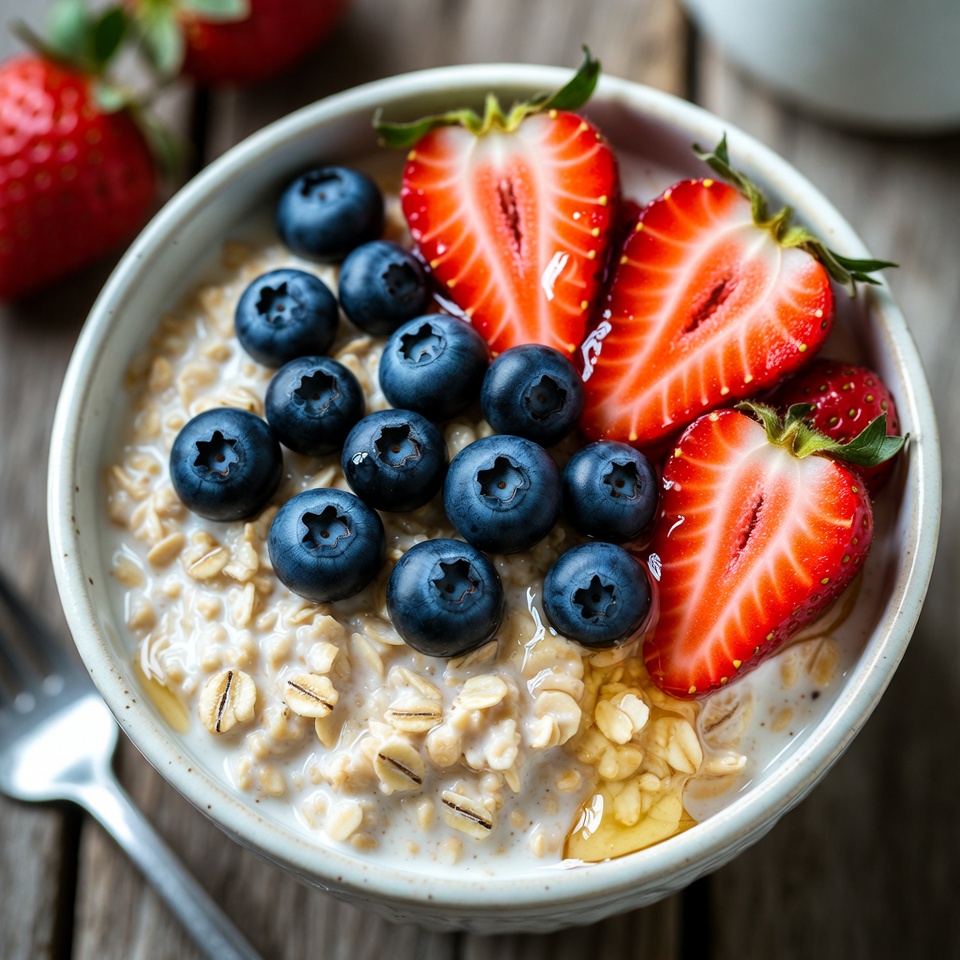
4. Serving Suggestions
Overnight oats are highly versatile. While they are often eaten straight from the jar for convenience, you can elevate the experience:
- Plating: Transfer to a wide, shallow ceramic bowl. Create “texture zones” by grouping toppings (nuts in one corner, fruit in another).
- Garnish: A sprinkle of flaky sea salt, a zest of lemon, or a dusting of cinnamon can brighten the earthy tones of the oats.
- Pairings: Serve alongside a hot pour-over coffee or a matcha latte. For a protein-heavy brunch, pair with a soft-boiled egg on the side.
- Temperature: While designed to be eaten cold, you can microwave them for 45–60 seconds if you prefer a lukewarm porridge on chilly mornings.
5. Nutritional Information
(Based on a standard base of 1/2 cup oats, 1/2 cup almond milk, and 1 tbsp chia seeds)
| Nutrient | Amount per Serving |
| Calories | 280–320 kcal |
| Protein | 8g – 12g |
| Fat | 7g – 10g |
| Fiber | 11g |
| Carbohydrates | 45g |
Health Benefits:
- Satiety: The high fiber content (specifically beta-glucan) slows digestion, keeping you full until lunch.
- Heart Health: Oats are proven to help lower LDL (bad) cholesterol.
- Prebiotics: Raw oats act as a prebiotic, feeding the good bacteria in your gut microbiome.
6. Storage and Reheating
- Refrigeration: Oats are best consumed within 3 to 5 days. The texture is most “al dente” on Day 1 and becomes softer/creamier by Day 4.
- Freezing: You can freeze overnight oats in freezer-safe containers for up to 3 months. Thaw in the fridge overnight before eating. Note: Fresh fruit toppings should only be added after thawing.
- Reheating: If you prefer them warm, add a splash of extra liquid (milk or water) before heating to maintain the creamy texture.
7. Expert Tips and Variations
The Professional Touch
- The Salt Secret: Always add a tiny pinch of salt to your base. It doesn’t make it salty; it unlocks the sweetness of the oats and the depth of the vanilla.
- Toast the Oats: For a nutty, sophisticated flavor, toast your dry oats in a pan for 2 minutes before soaking.
- The “Topping Split”: Mix “sturdy” ingredients (chia seeds, dried fruit) in at night, but keep “crunchy” ingredients (nuts, granola, fresh berries) in a separate container to add right before eating.
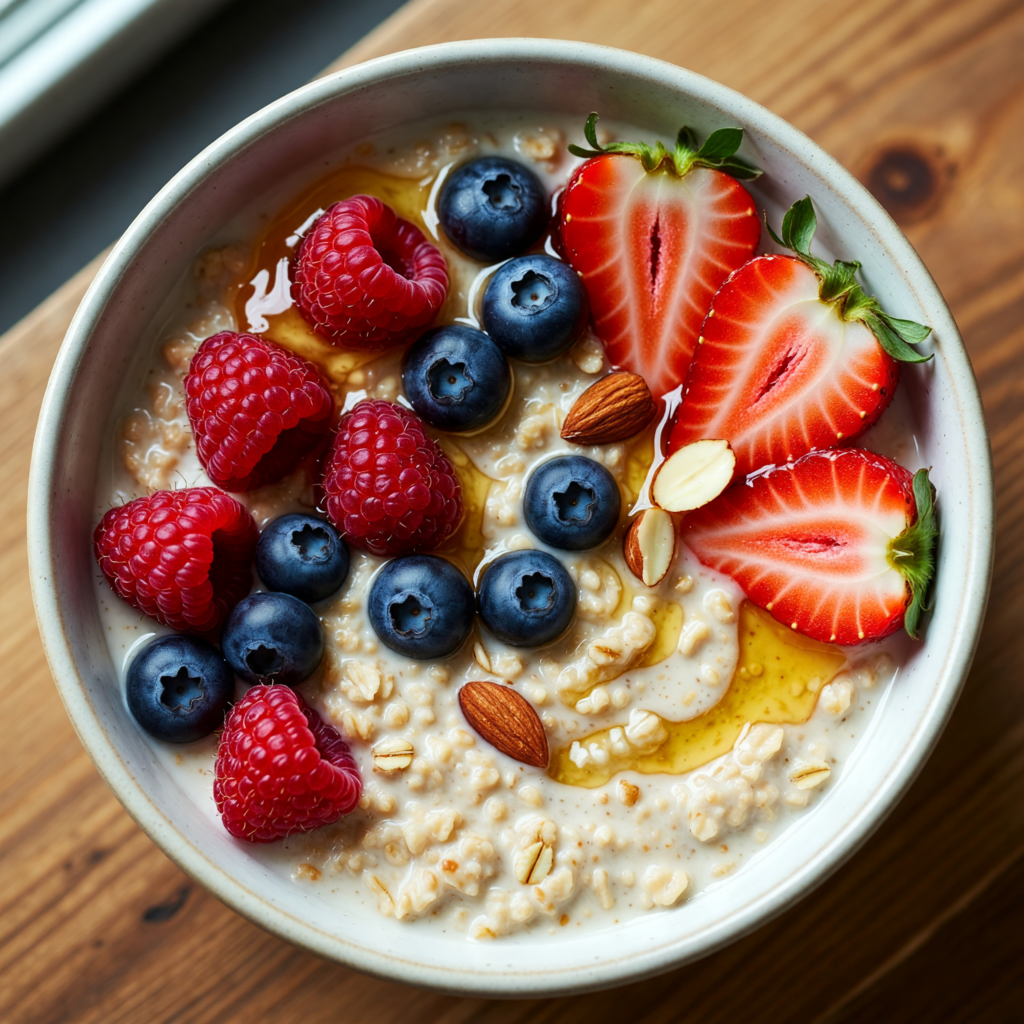
Creative Variations
- The PB&J: Add 1 tbsp peanut butter and 1 tbsp raspberry preserves.
- Carrot Cake: Stir in shredded carrots, raisins, walnuts, and a dollop of cream cheese or Greek yogurt.
- Mocha Power: Swap half the milk for cold brew coffee and add a teaspoon of cocoa powder.
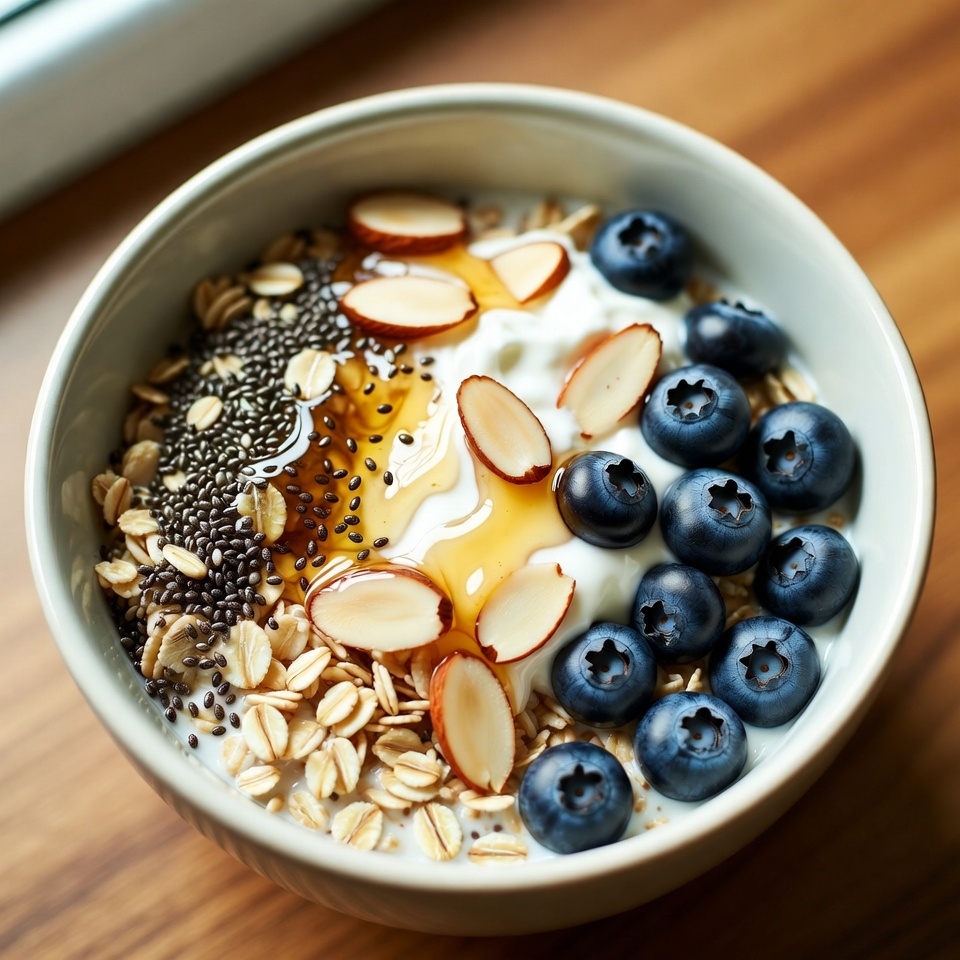
8. Ingredients Section
The Base Ratio
The “Golden Ratio” for overnight oats is 1 part oats : 1 part liquid.
- Oats: 1/2 cup (approx. 45g) Old Fashioned Rolled Oats. Do not use Instant/Quick oats (they turn to mush) or Steel Cut oats (they remain too crunchy unless soaked for 24+ hours).
- Liquid: 1/2 cup (120ml) of your choice (Almond milk, Oat milk, Coconut milk, or Dairy).
- The “Binder”: 1 tablespoon Chia Seeds. These are crucial for that pudding-like consistency.
- Sweetener: 1–2 teaspoons Maple syrup, Honey, or Agave.
- Flavor Boosters: 1/4 tsp Vanilla extract and a pinch of salt.
Substitutions:
- Milk: Use Coconut water for a lighter, tropical feel.
- Chia Seeds: If you dislike chia, use 2 tablespoons of Greek yogurt for thickness.
9. Step-by-Step Instructions
Step 1: The Dry Mix
Add your rolled oats, chia seeds, and salt into the Mason jar. Shake or stir to ensure the seeds are distributed; this prevents them from clumping at the bottom.
Step 2: The Liquid Phase
Pour in your chosen milk, sweetener, and vanilla.
Step 3: The Thorough Agitation
Use a spoon to stir vigorously. Ensure you scrape the bottom edges of the jar. The oats should be fully submerged.
Step 4: The First Rest
Let the jar sit on the counter for 5 minutes, then give it one final stir. This prevents the “chia-brick” phenomenon where seeds settle and harden into a mass.
Step 5: The Cold Cure
Seal the lid tightly and place in the refrigerator for a minimum of 6 hours.
Step 6: The Morning Finish
Remove the lid. You’ll notice the oats have absorbed the liquid. If it’s too thick, stir in an extra splash of milk. Top with your fresh fruit, nuts, or seeds and enjoy!
10. Frequently Asked Questions (FAQ)
Q: Can I use Steel Cut oats?
A: Not for a standard 6-hour soak. Steel cut oats are much denser. If you want to use them, you’ll need a 1:2 ratio of oats to liquid and at least 24 hours of soaking time.
Q: Why are my oats “slimy”?
A: This usually happens if you use too much liquid or use “Quick/Instant” oats. Stick to Rolled Oats for the best texture.
Q: Do I have to use chia seeds?
A: No, but they provide the “gel” that makes the oats creamy. Without them, your oats might sit in a pool of unabsorbed liquid. Greek yogurt is the best alternative.
Q: Are overnight oats good for weight loss?
A: Yes! Because they are high in fiber and protein, they keep you full longer, reducing the urge to snack. Just be mindful of high-sugar toppings like chocolate chips or excess honey.
Q: Can I eat them warm?
A: Absolutely. Just treat the “overnight” part as the cooking method, then warm them up in the microwave for a faster version of traditional oatmeal.
