
1. Introduction: A Cloud on a Plate
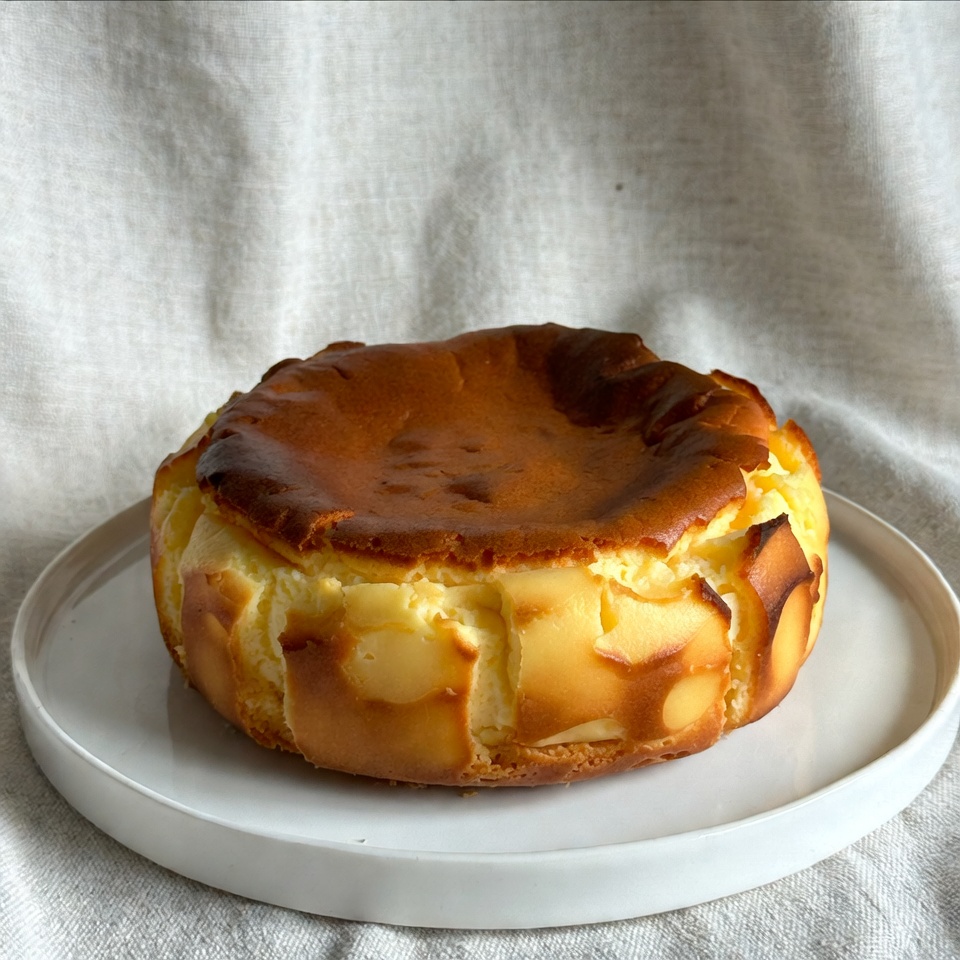
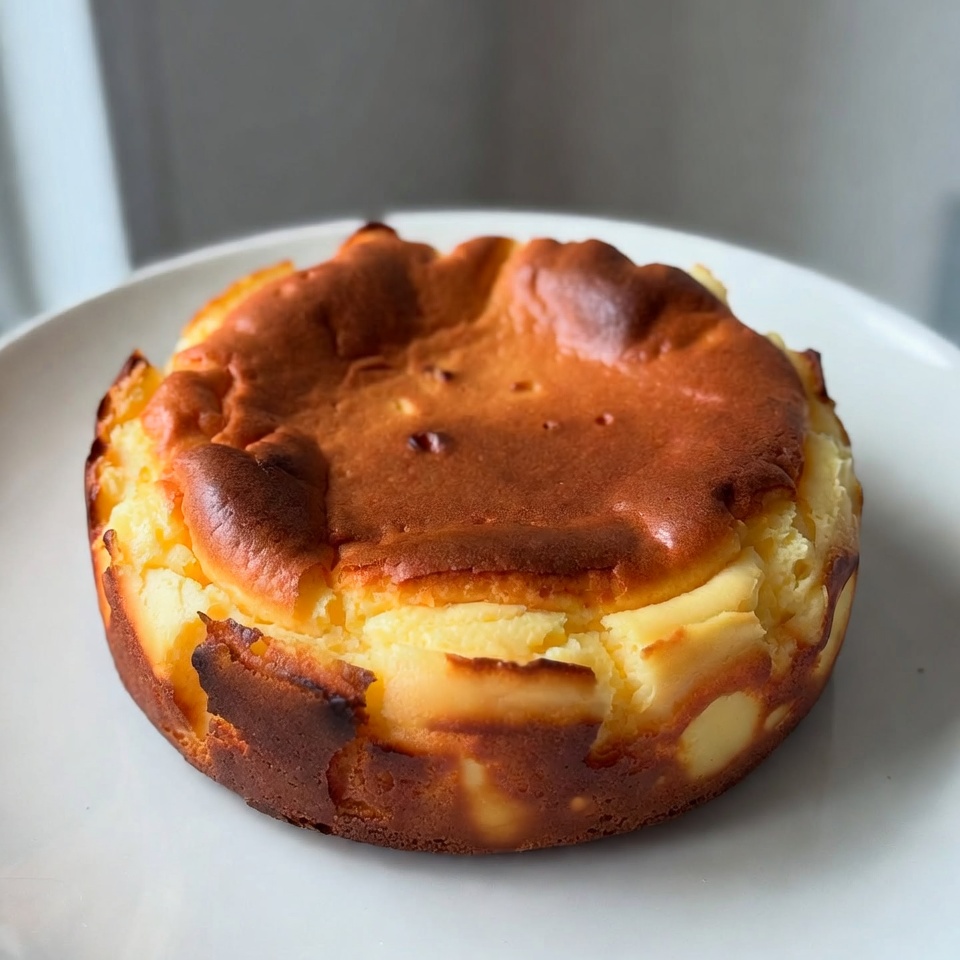
Imagine a dessert that possesses the richness of a traditional New York cheesecake but the ethereal, airy weightlessness of a French soufflé. This is the Japanese Cheesecake—often referred to as “Soufflé Cheesecake” or “Jiggly Cheesecake.”
Unlike its dense, graham-cracker-crusted Western cousin, the Japanese version is crustless, less sweet, and defined by its structural integrity. It is a feat of culinary engineering that relies on the physics of whipped egg whites rather than heavy thickening agents.
Originating in Hakata, Japan, in the 1940s, this dessert gained global fame through bakeries like Uncle Rikuro’s in Osaka. It represents the Japanese philosophy of Yōshoku—taking Western culinary concepts and refining them into something distinctly Japanese: subtle, balanced, and aesthetically minimalist. Whether you are chasing the nostalgia of a trip to Tokyo or looking to conquer a technical baking challenge, this guide will help you achieve that legendary “jiggle.”
2. Recipe Overview
- Cuisine Type: Japanese / Fusion
- Difficulty Level: Advanced (Requires precision with meringue and temperature control)
- Prep Time: 30 minutes
- Cook Time: 70–80 minutes
- Cooling Time: 2–4 hours (essential for structural setting)
- Dietary Classifications: Vegetarian, Nut-Free
3. Equipment and Tools
To achieve the perfect rise without cracking, you need the right “architecture” in your kitchen:
- Round Cake Pan: 8-inch (20cm) diameter with a depth of at least 3 inches (7.5cm). Fixed-base pans are preferred over springform to prevent water leakage.
- Large Deep Roasting Tray: To act as a bain-marie (water bath).
- Mixing Bowls: One heatproof glass bowl for the cheese melt and one very clean metal/glass bowl for the egg whites.
- Fine-Mesh Sieve: For sifting flour to ensure zero lumps.
- Electric Hand Mixer or Stand Mixer: Essential for the meringue stage.
- Parchment Paper: High-quality non-stick paper. You will need to line the bottom and create a “collar” that extends 2 inches above the rim of the pan.
- Kitchen Scale: Digital scales are mandatory; volume measurements (cups) are too imprecise for this recipe.
4. Serving Suggestions
Japanese cheesecake is versatile and changes character based on its temperature.
- The Warm Experience: Serve it 15 minutes after baking for maximum “jiggle” and a melt-in-your-mouth, custardy texture.
- The Chilled Experience: Refrigerate for 4 hours. The flavor deepens, and the texture becomes more like a fine-crumbed sponge cake.
- Garnish Ideas: A light dusting of powdered sugar is traditional. For a modern twist, add a dollop of lightly sweetened whipped cream and fresh seasonal berries (strawberries or raspberries).
- Pairings: Serve with a high-quality Sencha green tea to cut through the creaminess, or a light-roast coffee.
5. Nutritional Information (Per Serving)
Based on 12 servings per cake.
| Nutrient | Amount per Serving |
| Calories | 210 kcal |
| Total Fat | 14g |
| Saturated Fat | 8g |
| Cholesterol | 115mg |
| Sodium | 180mg |
| Total Carbohydrates | 16g |
| Sugars | 12g |
| Protein | 6g |
Health Note: This cake is significantly lower in sugar and fat than standard cheesecakes, making it a “lighter” indulgence.
6. Storage and Reheating
- Refrigeration: Store in an airtight container for up to 4 days. The cake will shrink slightly as it cools; this is normal.
- Freezing: While possible, freezing is not recommended as it can compromise the delicate airy structure. If you must, wrap tightly in plastic and freeze for up to 2 weeks. Thaw in the fridge overnight.
- Reheating: To regain some of the fluffiness, microwave a slice for 10–15 seconds. Do not overheat, or the fats will separate.
7. Expert Tips and Variations
Professional Chef Tips
- Room Temperature Ingredients: Your cream cheese, butter, and milk must be combined over a water bath, but your egg yolks should be at room temperature to emulsify properly.
- The “Soft Peak” Rule: Do not overbeat your egg whites. You want “bird’s beak” peaks—curving slightly at the tip. Stiff peaks will cause the cake to crack during baking.
- The Steam Factor: The water bath creates a moist environment that prevents the top from drying out and cracking.
Common Mistakes to Avoid
- Opening the Oven Door: Sudden temperature drops cause the cake to collapse instantly.
- Greasing the Sides: Do not grease the parchment paper on the sides; the cake needs to “climb” the paper to rise.
Creative Variations
- Matcha: Sift 15g of ceremonial grade Matcha powder with the flour.
- Chocolate: Fold in 50g of melted dark chocolate to the cheese mixture.
- Lemon Scented: Add the zest of two lemons and 10ml of juice for a bright finish.
8. Ingredients Section
The Cheese Base
- 250g (8.8 oz) Cream Cheese: Use full-fat, brick-style (e.g., Philadelphia).
- 50g (1.8 oz) Unsalted Butter: High-quality European style preferred.
- 100ml (3.4 fl oz) Full-Cream Milk: Room temperature.
- 6 Large Egg Yolks: Room temperature.
- 1 tsp Vanilla Extract: Or vanilla bean paste.
- 1 tbsp Lemon Juice: Provides acidity to stabilize the proteins.
The Flour Mix
- 60g (2.1 oz) Cake Flour: Low protein content is vital for softness.
- 20g (0.7 oz) Cornstarch: Adds structural stability.
The Meringue
- 6 Large Egg Whites: Must be cold for a more stable, fine-pored foam.
- 140g (4.9 oz) Superfine Sugar (Caster Sugar): Dissolves quickly.
- 1/4 tsp Cream of Tartar: To stabilize the egg whites.
9. Step-by-Step Instructions
Step 1: Preparation and Lining
Preheat your oven to 160°C (320°F). Line your cake pan. Ensure the parchment paper stands at least 2 inches above the rim. Wrap the outside of the pan in two layers of heavy-duty aluminum foil to prevent water seepage.
Step 2: The Double Boiler Melt
In a heatproof bowl over a pot of simmering water (double boiler), combine cream cheese, butter, and milk. Whisk until completely smooth and no lumps remain. Remove from heat and let it cool slightly.
Step 3: Emulsifying the Yolks
Whisk the egg yolks into the warm cheese mixture one at a time. Add the lemon juice and vanilla. Sift the cake flour and cornstarch over the mixture and whisk gently until just combined. Strain the entire mixture through a fine-mesh sieve into a clean bowl for a “silky” finish.
Step 4: The Perfect Meringue
In a separate clean bowl, beat the egg whites and cream of tartar on medium speed. Once frothy, add the sugar in three stages. Increase speed to medium-high until soft peaks form. The meringue should be glossy and hold its shape but the tip should fold over when you lift the whisk.
Step 5: The Gentle Fold
Fold 1/3 of the meringue into the cheese batter using a whisk to lighten it. Then, switch to a spatula and fold in the remaining meringue in two batches using a “cut and fold” motion. Be extremely gentle to avoid deflating the air bubbles.
Step 6: The Water Bath Bake
Pour the batter into the prepared pan. Tap the pan on the counter three times to release large air bubbles. Place the pan in a roasting tray and fill the tray with hot water (about $50^\circ\text{C}$ or $122^\circ\text{F}$) until it reaches halfway up the side of the cake pan.
Step 7: The Multi-Stage Baking Method
- Bake at 160°C (320°F) for 20 minutes.
- Reduce heat to 140°C (285°F) and bake for another 40–50 minutes.
- Turn off the oven and leave the door slightly ajar with the cake inside for 15 minutes. This slow cooling prevents the cake from shrinking too fast.
10. Frequently Asked Questions (FAQ)
Q: Why did my cake crack on top?
A: Usually, this is caused by the oven being too hot or the egg whites being whipped to stiff peaks. Stiff peaks expand too much and “burst” the surface.
Q: Why is there a dense layer at the bottom?
A: This is due to improper folding. If the meringue isn’t fully incorporated, the heavier cheese mixture sinks to the bottom during baking.
Q: Can I use All-Purpose flour instead of Cake Flour?
A: You can, but the texture will be slightly tougher. To mimic cake flour, replace 1 tablespoon of All-Purpose flour with 1 tablespoon of cornstarch.
Q: Why did my cake deflate significantly after taking it out?
A: All Japanese cheesecakes shrink slightly, but a total collapse usually means the cake was underbaked or cooled too rapidly.
Q: How do I know it’s done?
A: The top should be golden brown, and when you gently shake the pan, the center should have a slight jiggle but not look “liquid.” A skewer inserted should come out clean.
