1. Introduction
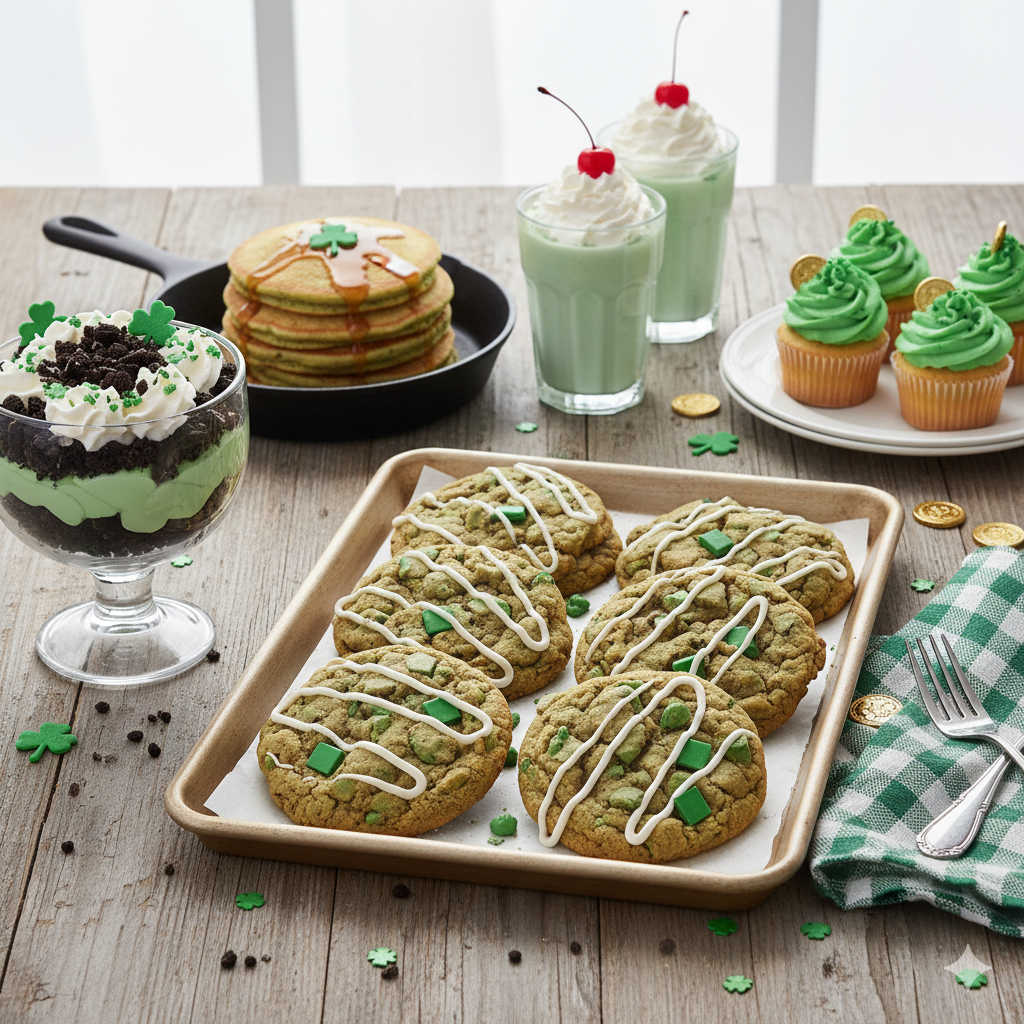
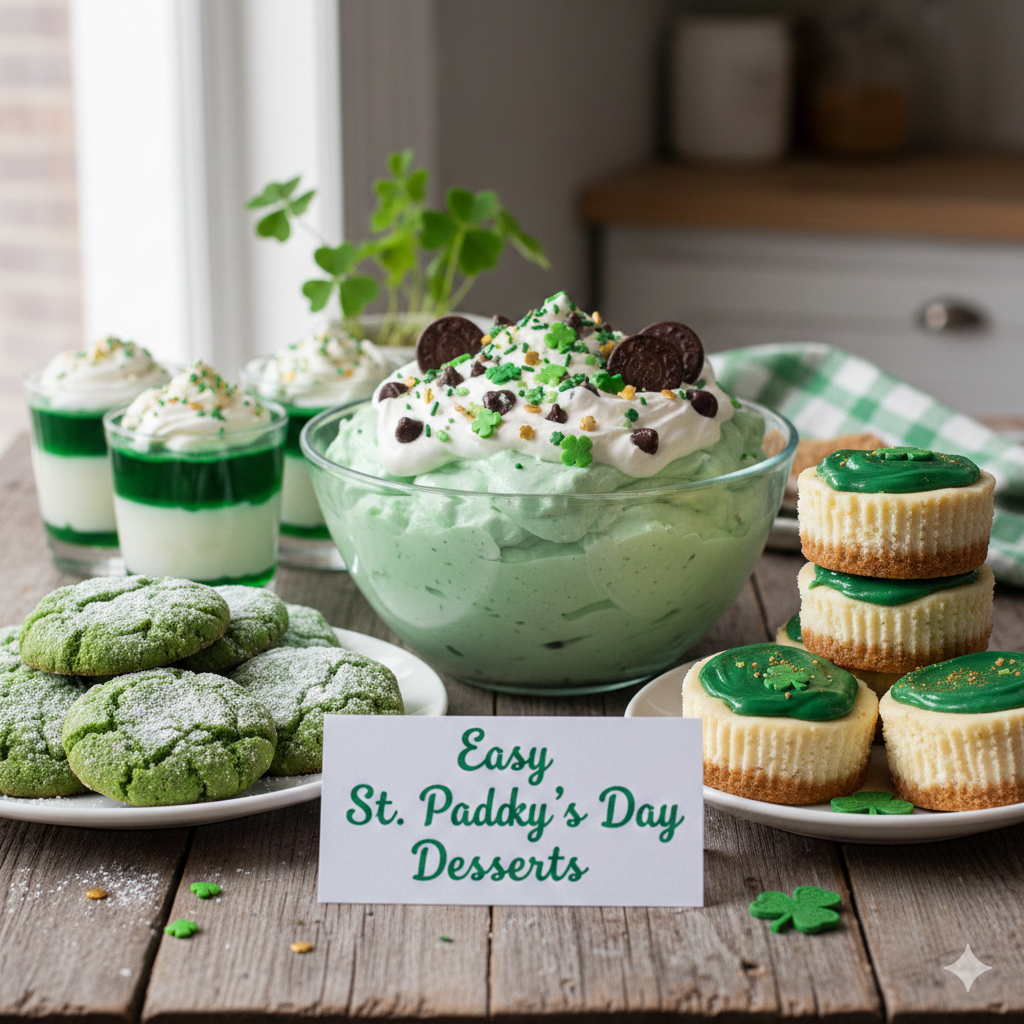
When the calendar turns to March, the world takes on a decidedly emerald hue. St. Patrick’s Day is more than just a cultural celebration of the Patron Saint of Ireland; it has evolved into a global festival of conviviality, music, and, most importantly, indulgent food. While savory classics like corned beef and cabbage or shepherd’s pie often take center stage, the true magic of a festive Irish gathering lies in the sweets.
The tradition of “treating” on St. Patrick’s Day is rooted in the temporary lifting of Lenten fasting restrictions, allowing revelers to enjoy the rich, sugary delights they might have been abstaining from. Today, that spirit lives on through vibrant green hues, rich chocolate pairings, and the unmistakable warmth of Irish cream. Whether you are hosting a sprawling neighborhood “céilidh” or simply looking to surprise your kids with a bit of “leprechaun gold,” these easy desserts are designed to bring maximum joy with minimal kitchen stress.
In this guide, we aren’t just giving you one recipe; we are exploring a curated collection of treats that range from the minty-fresh to the decadently boozy. Each one is a tribute to the “Luck of the Irish”—no four-leaf clover required.
2. Recipe Overview
- Cuisine Type: Irish-American Fusion / Holiday Dessert
- Difficulty Level: Easy to Intermediate
- Total Preparation and Cooking Time: 30 minutes to 2 hours (varies by recipe)
- Dietary Classifications: Primarily Vegetarian; options for Gluten-Free and Nut-Free adaptations provided.
3. Equipment and Tools
To ensure your St. Paddy’s Day baking goes off without a hitch, gather the following essential tools:
Essential Kitchen Tools
- Stand Mixer or Electric Hand Mixer: Crucial for achieving the perfect aeration in frostings and batters.
- Mixing Bowls: A set of stainless steel or glass bowls (Small, Medium, and Large).
- Silicone Spatulas: For folding in delicate ingredients like mint chips or food coloring.
- Measuring Tools: Both liquid measuring cups and dry measuring spoons are necessary for precision.
Specific Equipment Specifications
- Standard Cupcake Tin: 12-slot capacity for muffins or “Pot of Gold” cupcakes.
- 9×13 Inch Baking Pan: Ideal for “Leprechaun Bars” or Irish Cream brownies.
- Springform Pan (9-inch): Required if you’re attempting a No-Bake Irish Cheesecake.
- Piping Bags and Tips: A large star tip (1M) is best for that iconic swirl on festive cupcakes.
- Parchment Paper: Prevents sticking and makes cleanup a breeze.
4. Serving Suggestions
Presentation is half the battle when it comes to holiday baking.
- Plating Recommendations: Serve minty treats on white ceramic platters to make the green colors pop. For rustic Irish Soda Bread puddings, use wooden boards.
- Garnish Ideas: Dust with edible gold glitter, top with lucky charm marshmallows, or use fresh mint leaves for a sophisticated touch.
- Complementary Side Dishes: A side of vanilla bean ice cream or a dollop of homemade Baileys-infused whipped cream.
- Beverage Pairings: * Adults: Irish Coffee or a stout beer float.
- Kids: “Shamrock Shakes” or green-tinted milk.

5. Nutritional Information
Note: Values are estimated per average serving.
| Nutrient | Amount |
| Calories | 250 – 380 kcal |
| Total Fat | 12g – 18g |
| Saturated Fat | 7g – 10g |
| Carbohydrates | 35g – 50g |
| Sugars | 25g – 40g |
| Protein | 3g – 5g |
Dietary Information: These recipes are rich in carbohydrates and fats. For a healthier twist, Greek yogurt can often be substituted for sour cream in cake recipes to increase protein and reduce fat.
6. Storage and Reheating
Keep your luck fresh with these storage tips:
- Refrigeration: Most cream-cheese based frostings or “mint-chocolate” desserts must be refrigerated in airtight containers for up to 5 days.
- Freezing: Cookies and unfrosted brownies can be frozen for up to 3 months. Wrap tightly in plastic wrap and then foil.
- Reheating: For warm desserts like Irish Bread Pudding, microwave individual portions for 20-30 seconds or reheat the whole dish in a 300°F (150°C) oven for 10 minutes to maintain texture.
7. Expert Tips and Variations
- The Food Coloring Secret: Use gel food coloring instead of liquid drops. It provides a more vibrant “emerald” green without thinning out your frosting or batter.
- Room Temperature Ingredients: Always ensure your butter and eggs are at room temperature to prevent the batter from curdling and to ensure a smooth emulsion.
- Avoid Overmixing: When adding flour to your St. Paddy’s brownies or cakes, mix only until the white streaks disappear. Overmixing leads to tough, rubbery desserts.
- Variations: * The “Tipsy” Twist: Add a splash of Irish Whiskey to chocolate ganache.
- The “Kid-Friendly” Twist: Use crushed pistachio nuts for a natural green hue if you want to avoid dyes.
8. Ingredients Section (Featured Recipe: Mint Oreo Truffles)
These are a crowd favorite because they require no baking!
Precise Ingredient List
- Oreo Cookies: 1 standard package (approx. 36 cookies). Do not remove the cream filling.
- Cream Cheese: 8 oz (225g), softened to room temperature.
- Peppermint Extract: ½ tsp (optional, for extra minty kick).
- White Chocolate Melts: 12 oz (340g).
- Green Gel Food Coloring: 2-3 drops.
- Festive Sprinkles: Gold stars or green sanding sugar.
Measurement Conversions
- 1 oz = 28.35 grams
- 1 cup = 236 ml (for liquids)
Quality and Sourcing
Look for high-quality white chocolate melting wafers (like Ghirardelli) rather than chocolate chips; melting wafers contain more cocoa butter and provide a smoother, glossier finish for dipping.
9. Step-by-Step Instructions: Mint Oreo Truffles
- Crush the Cookies: Place the entire package of Oreos into a food processor. Pulse until you achieve a fine, sandy crumb texture. If you don’t have a processor, place cookies in a gallon-sized Ziploc bag and crush with a rolling pin.
- Combine with Cream Cheese: In a large mixing bowl, beat the softened cream cheese until smooth. Add the cookie crumbs (and peppermint extract if using). Mix until a dense, uniform dough forms.
- Form the Balls: Line a baking sheet with parchment paper. Scoop about 1 tablespoon of the mixture and roll it between your palms to form a 1-inch ball. Repeat until all dough is used.
- Chill Out: Place the baking sheet in the freezer for 20 minutes. This is a crucial “professional technique”—if the balls are too warm, they will fall apart when you dip them in the warm chocolate.
- Melt the Coating: Using a double boiler or a microwave-safe bowl (in 30-second intervals), melt the white chocolate. Stir in the green gel food coloring until you reach your desired “Shamrock” shade.
- The Dip: Using a fork, dip each chilled truffle into the melted chocolate. Tap the fork against the side of the bowl to let excess chocolate drip off.
- Decorate: Place back on the parchment paper and immediately top with sprinkles before the chocolate sets.
- Final Set: Refrigerate for at least 30 minutes before serving.
10. Frequently Asked Questions (FAQ)
Q: Can I make these desserts ahead of time?
A: Absolutely! Most St. Paddy’s Day treats, especially truffles and bars, actually taste better after the flavors have melded in the fridge for 24 hours.
Q: What if I don’t like mint?
A: You can easily swap mint for vanilla or almond extract. Use green food coloring to keep the “vibe” without the peppermint flavor.
Q: My white chocolate is clumping; how do I fix it?
A: White chocolate is temperamental. If it “seizes,” it usually means a drop of water got into the bowl or it was overheated. Add a teaspoon of coconut oil or vegetable shortening and stir vigorously to smooth it out.
Q: Is Irish Cream safe for kids in baking?
A: While much of the alcohol burns off during baking (like in a cake), some remains. For a 100% kid-safe version, use an “Irish Cream” flavored coffee creamer instead of the actual liqueur.
Q: How do I get the perfect “Grass Green” color?
A: Start with a tiny amount of leaf-green gel. If it looks too “neon,” add a microscopic toothpick-dot of black or brown gel to deepen the tone into a more natural emerald.
