1. Introduction: The Timeless Allure of the Griddle
There is a specific, quiet magic to a Saturday morning defined by the rhythmic clink-clink-clink of a whisk against a ceramic bowl. Long before the era of frozen waffles and protein-packed breakfast bars, there were Old-Fashioned Pancakes. This isn’t just a recipe; it is a culinary heirloom, a staple of the American breakfast table that transcends generations.
The origin of the “pancake” dates back to ancient civilizations, but the specific “Old-Fashioned” style we crave today—thick, leavened, and slightly sweet—found its footing in early American hearth cooking. These pancakes are significant because they rely on pantry staples: flour, milk, eggs, and a touch of butter. They represent a time when breakfast was a deliberate act of care, designed to fuel a day of hard work with warmth and comfort.
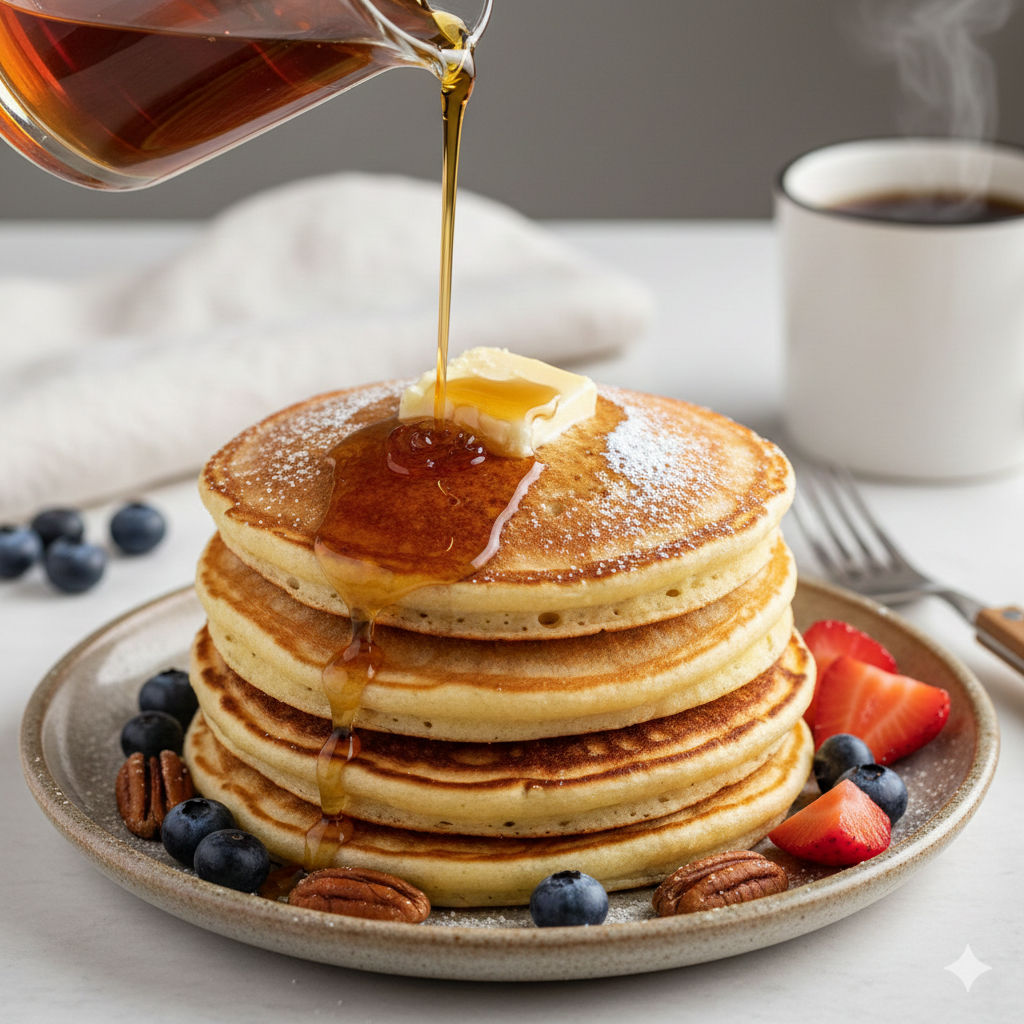
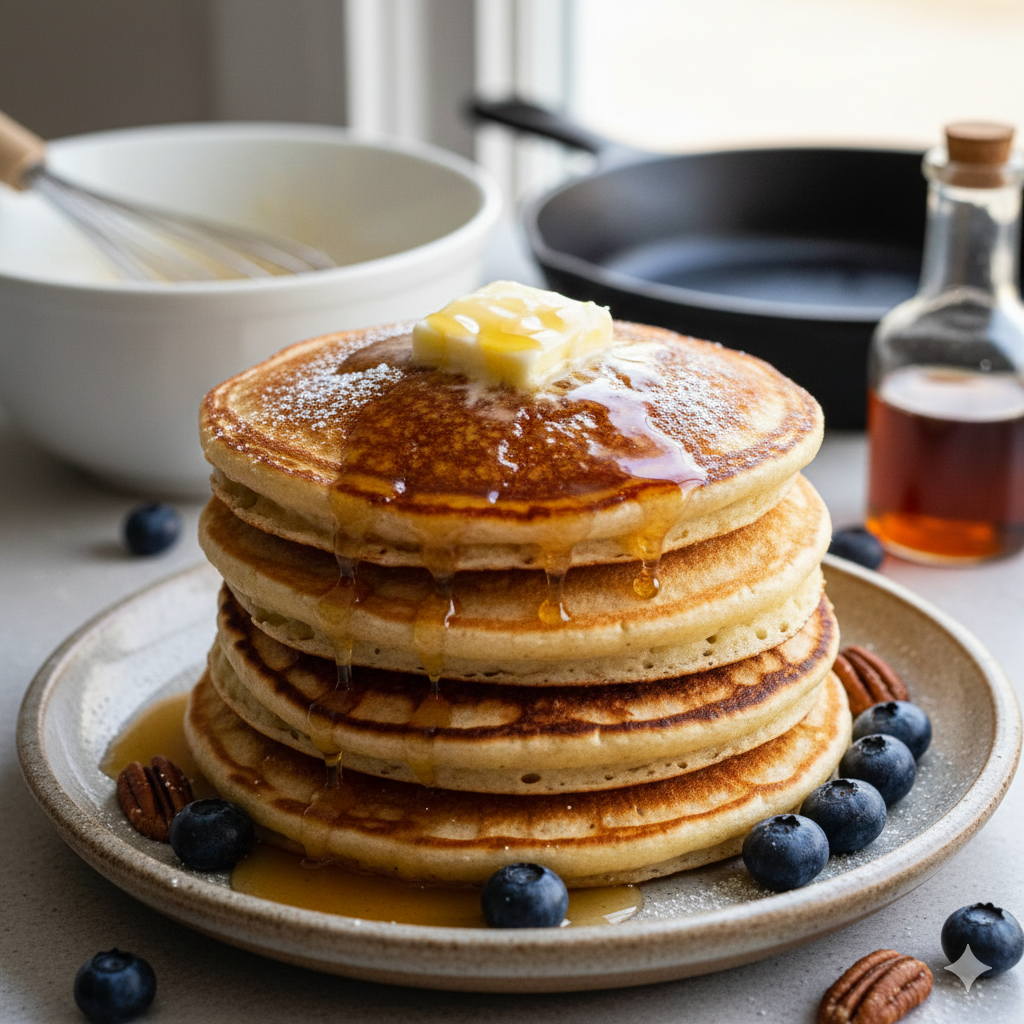
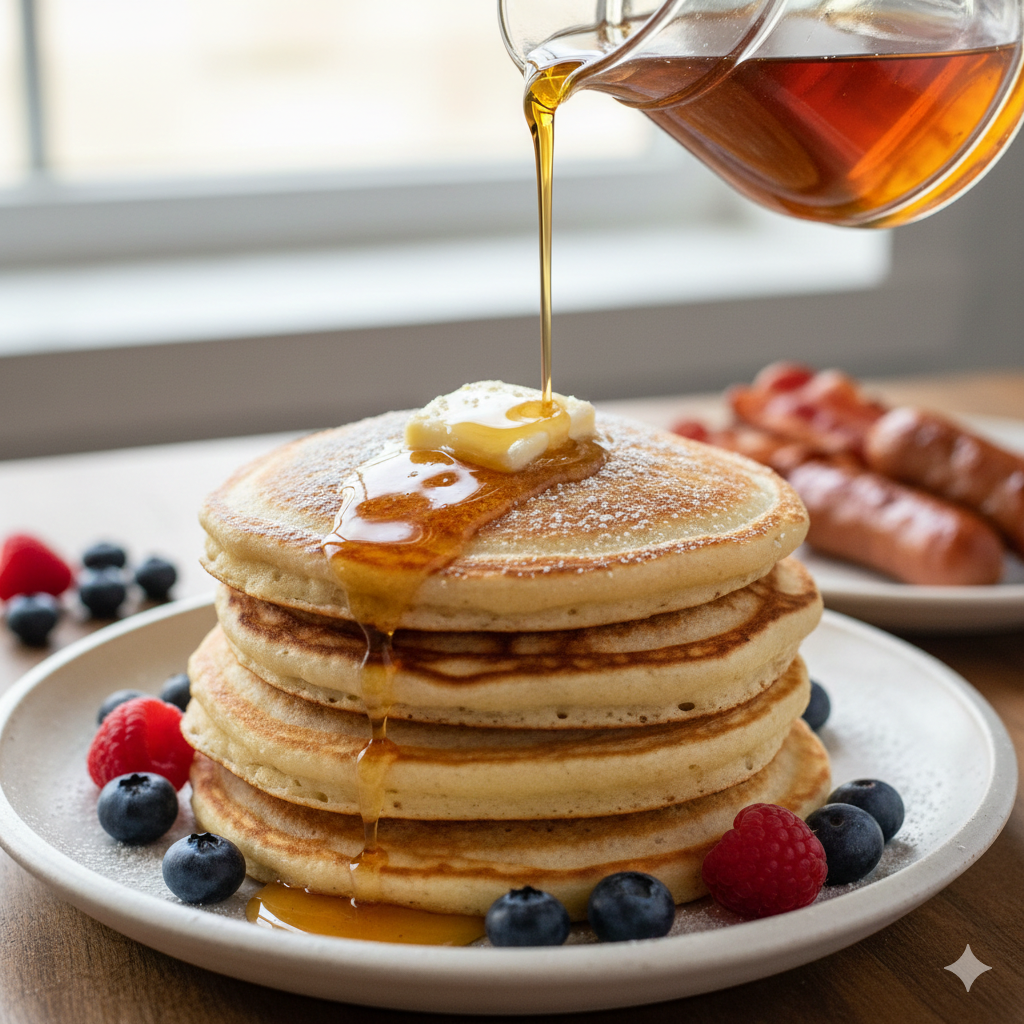
What sets this particular recipe apart is its commitment to texture. We aren’t looking for paper-thin crêpes or dense, rubbery discs. We are aiming for “cloud-like” architecture—pancakes with a crisp, golden-brown exterior and a soft, airy center that acts as a sponge for pure maple syrup.
2. Recipe Overview
- Cuisine Type: American Breakfast
- Difficulty Level: Easy/Beginner
- Prep Time: 10 minutes
- Cook Time: 15 minutes
- Total Time: 25 minutes
- Dietary Classifications: Vegetarian (Can be modified for Gluten-Free or Dairy-Free)
3. Equipment and Tools
To achieve the perfect “flip,” you need the right arsenal. Using a high-quality pan ensures even heat distribution, which is the secret to that uniform golden color.
- Mixing Bowls: One large bowl for dry ingredients, one medium bowl for wet.
- Whisk: A balloon whisk is ideal for aerating the batter.
- Sifter/Fine Mesh Strainer: Essential for removing lumps from the flour.
- Electric Griddle or Large Non-Stick Skillet: 12-inch diameter recommended.
- Flat Silicone or Metal Spatula: A wide, thin turner makes flipping effortless.
- Measuring Cups and Spoons: For precision (Volume: 1/4 cup for portioning).
- Wire Cooling Rack: To prevent the bottom of the pancakes from getting soggy while you finish the batch.
4. Serving Suggestions
Presentation is half the meal. For a true “diner-style” experience, stack three to four pancakes high.
- Plating: Serve on a warmed ceramic plate to maintain temperature.
- Garnish: A thick pat of salted grass-fed butter and a dusting of powdered sugar.
- Sides: Crispy thick-cut bacon, maple sausage links, or a side of fresh seasonal berries.
- Beverage Pairings: * Coffee: A medium-roast Colombian coffee balances the sweetness.
- Juice: Freshly squeezed orange juice for a bright acid hit.
- Tea: Earl Grey with a splash of milk.
5. Nutritional Information (Per Serving)
Note: Based on a serving size of 2 pancakes.
| Nutrient | Amount |
| Calories | 310 kcal |
| Total Fat | 12g |
| Saturated Fat | 7g |
| Cholesterol | 65mg |
| Sodium | 480mg |
| Total Carbohydrates | 42g |
| Dietary Fiber | 1g |
| Sugars | 8g |
| Protein | 7g |
Health Benefits: This recipe provides a quick source of carbohydrates for energy and a moderate amount of protein. For added health benefits, consider substituting a portion of the flour with whole wheat or adding flaxseed.
6. Storage and Reheating
Pancakes are surprisingly durable and make for excellent “on-the-go” breakfasts during the week.
- Refrigeration: Store in an airtight container for up to 3 days. Place parchment paper between layers to prevent sticking.
- Freezing: Flash-freeze pancakes in a single layer on a baking sheet for 1 hour, then transfer to a freezer-safe bag. They stay fresh for up to 2 months.
- Reheating:
- Toaster: The best way to regain the crisp exterior.
- Oven: 350°F (175°C) for 5-8 minutes, covered in foil to prevent drying.
- Microwave: 20-30 seconds (best for a soft, quick snack).
7. Expert Tips and Variations
Professional Chef Tips
- Don’t Overmix: This is the golden rule. Stir until the flour streaks disappear. A few lumps are your friends; they ensure a tender crumb.
- The “Sizzle” Test: Flick a drop of water onto the pan. If it dances and evaporates instantly, the pan is ready.
- Rest the Batter: Let the batter sit for 5-10 minutes. This allows the gluten to relax and the baking powder to fully activate.
Creative Variations
- The Lemon-Ricotta: Fold in 1/2 cup of ricotta cheese and 1 tbsp of lemon zest for a sophisticated twist.
- Chocolate Chip Pecan: Add dark chocolate chips and toasted pecans for texture.
- Blueberry Burst: Always add blueberries after pouring the batter onto the griddle to prevent the whole pancake from turning purple.
8. Ingredients Section
The quality of your ingredients directly dictates the quality of your breakfast.
- 1 ½ cups (190g) All-Purpose Flour: Use a high-quality unbleached flour.
- 3 ½ tsp Baking Powder: Ensure it is fresh for maximum lift.
- 1 tsp Salt: Fine sea salt is preferred.
- 1 tbsp White Sugar: For caramelization and browning.
- 1 ¼ cups (300ml) Whole Milk: Provides the richest flavor.
- 1 Large Egg: Room temperature for better emulsification.
- 3 tbsp (45g) Butter, Melted: Plus extra for the pan.
- 1 tsp Pure Vanilla Extract: Adds a subtle aromatic depth.
9. Step-by-Step Instructions
Step 1: Prepare the Dry Base
In a large mixing bowl, sift together the flour, baking powder, salt, and sugar. Sifting is crucial as it aerates the flour, contributing to that “old-fashioned” fluffiness.
Step 2: Whisk the Wet Ingredients
In a separate medium bowl, whisk the egg until light and frothy. Slowly pour in the milk, melted butter (ensure it’s cooled slightly so you don’t scramble the egg), and vanilla extract.
Step 3: The Marriage of Mixtures
Make a well in the center of the dry ingredients. Pour the wet mixture into the center. Using a spatula, gently fold the ingredients together using a circular motion. Stop the moment you no longer see dry flour.
Step 4: Temper the Heat
Heat your griddle over medium-high heat. Lightly oil the surface with butter or a neutral oil. You want a thin film, not a puddle.
Step 5: The Pour
Use a 1/4 cup measuring cup to scoop the batter onto the griddle. This ensures uniform size and even cooking times.
Step 6: The “Bubble” Indicator
Cook for about 2-3 minutes. Watch for bubbles to form on the surface and pop. Once the edges look set and matte (rather than shiny), it is time to flip.
Step 7: The Flip and Finish
Slide your spatula underneath and flip in one confident motion. Cook for an additional 1-2 minutes until the second side is golden brown.
10. Frequently Asked Questions (FAQ)
Q: Why are my pancakes flat?
A: Your baking powder might be expired. Test it by putting a teaspoon in hot water; if it doesn’t bubble vigorously, replace it. Also, ensure you aren’t overmixing.
Q: Can I use buttermilk instead of regular milk?
A: Yes! However, because buttermilk is acidic, you should replace 1 tsp of the baking powder with 1/2 tsp of baking soda to balance the pH and help with rising.
Q: How do I keep them warm for a crowd?
A: Set your oven to “Warm” (about 200°F) and place the finished pancakes on a baking sheet in a single layer until ready to serve.
Q: Why is the first pancake always bad?
A: This is usually due to improper heat distribution or too much oil. Consider the first pancake your “sacrificial lamb” to calibrate the pan’s temperature.
Q: Can I make the batter the night before?
A: It’s not recommended. The leavening agents (baking powder) begin to lose their potency the moment they hit the liquid. For the best rise, cook immediately.